04. Animating the Door
Using Unity 2021.3.27f1 and Visual Scripting 1.8.0. The project is using the 2D Core template.

In this example we will animate the door using only scripts, so that it moves from one position to another with a smooth motion.
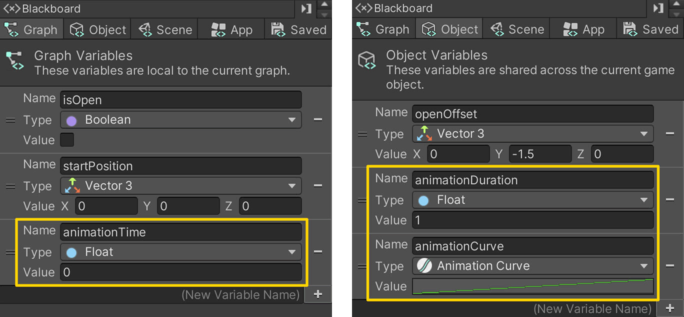
Start by adding two additional Object variables to the door graph:
animationDurationof typeFloatanimationCurveof typeAnimation Curve
We can use the Animation Curve to control easing of the door or even give it a bounce effect! Together with the animationDuration we get fine-grained control of the motion from start to end.
In addition, we add a Graph variable named animationTime of type Float. We will use this variable to remember how far the animation has progressed. Initially, we set the value of animationTime to be the same as animationDuration, thereby assuming that the animation is “done” when our game starts. The animation is then restarted whenever the door is toggled.
A lot is going on in this graph, so let us walk through it one by one.
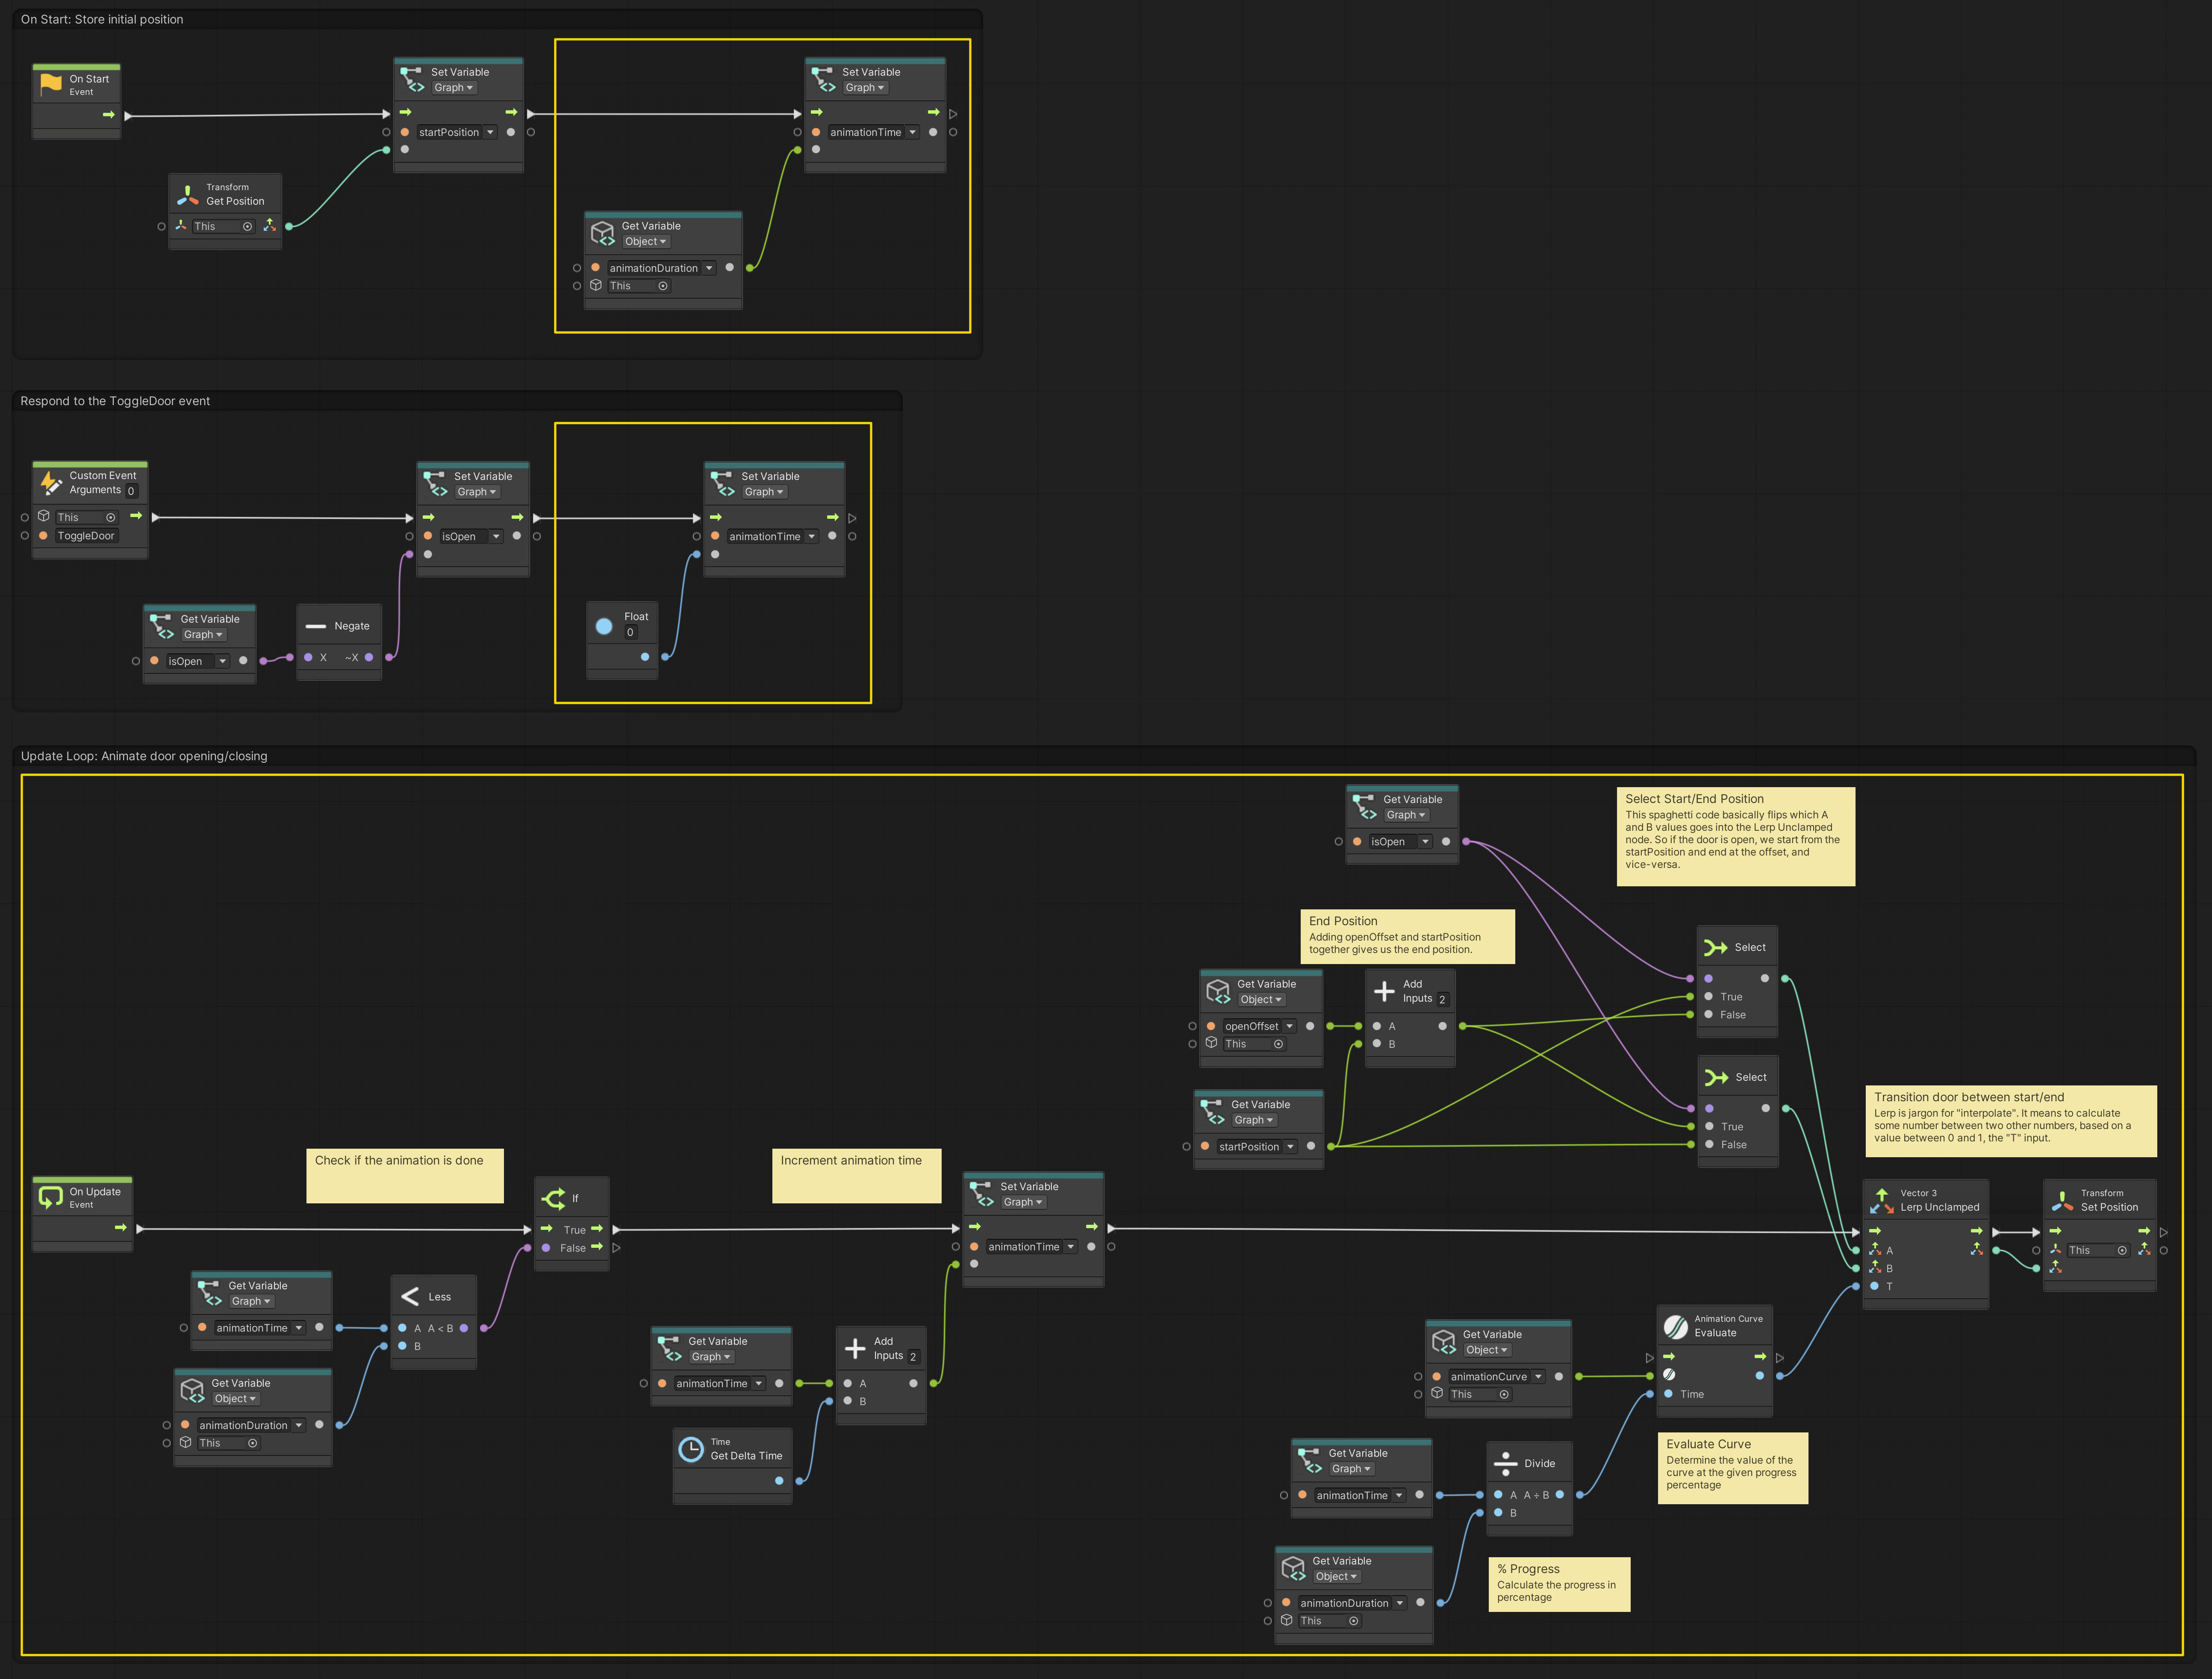
Starting from the top, the On Start event simply sets the animationTime to the value of animationDuration. This makes our On Update event flow stop at the first If node it encounters and prevents any movement. In other words, no animation is happening.
The Custom Event named ToggleDoor sets the animationTime to 0. This has the effect of restarting the animation and starting from the beginning of the transition between open and closed. As you can see in the GIF above, the animation “jumps” when the player is pressing the button rapidly. This is because the animation always goes to zero and begins from either the open or closed position.
The On Update event flow first checks if the animationTime is less than the animationDuration. If it is, then it increments the animationTime effectively making it a timer that increases in real-time.
The upper part of the second half, determines where the door should begin its movement and where it should move to. The startPosition is where the door is when it is closed, and the open position is startPosition + openOffset (adding the two vectors together).
The Select node then uses the isOpen variable to decide which values goes to the A and B inputs of the Lerp Unclamped node. If you look closely at the two Select nodes, you will see that the inputs are simply flipped. The result is that the position of where the door begins and ends its animation is dependant on whether isOpen is true or false.
The Lerp Unclamped node then takes the start and end position as inputs together with a special value called T. If you imagine a line, the value of T describes how far along the line the output should be. A value of 0.0 means it will be right at the beginning and a value of 1.0 means at the end. Any number in between will be a percentage between the two vectors. The word unclamped means that the value of T can go past 1.0, like 1.5, which would make the door overshoot its target. Try making a curve like the one below to see what I mean.
Lerp is jargon for linear interpolate. Given two values, a number or vector in between can be found using linear interpolation.
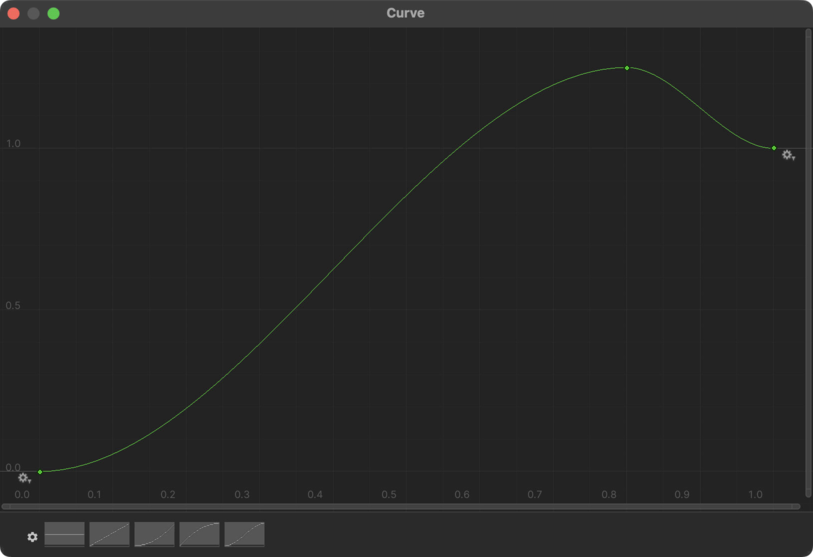
The final piece of the puzzle, is to evaluate the Animation Curve. That means given some value along the X-axis (or time axis), the curve will evaluate to some value along the Y-axis. So we divide the animationTime with the animationDuration to get a percentage of how much the animation has progressed, and use this number to evaluate the curve along the X-axis. You may imagine time moving from left to right along the curve.