03. Opening a Door
Using Unity 2021.3.33f1 and Visual Scripting 1.8.0. The project is using the 2D Core template.

In this example, we will send an event from the button to the door, which switches the door between being open and closed. An event is some occurrence in the system that other parts of the system can respond to. An analogy from daily life would be you waking up (the response) when an alarm clock rings (the event).
See the visual script version: 03. Opening A Door
Events and delegates
Events in C# are a bit more complicated than in visual scripts. They are defined by a delegate and an event. The delegate is a special signature that defines exactly how others are expected to receive the event.
For our purposes, all you need to know is that:
- An event is like broadcasting a message.
- Others can subscribe and unsubscribe to events, like a newsletter.
- The one “broadcasting” the event decides when it should happen, but does not care about what others do once they receive the event.
Here is an example of an event, where a delegate is defined and the event is raised in the Start() method we have used previously.
1
2
3
4
5
6
7
8
9
10
public delegate void ButtonEvent(bool switchedOn);

public event ButtonEvent onButtonChange;

private void Start()
{
    bool value = true;

    onButtonChange?.Invoke(value);
}
Notice how the first line with the delegate looks similar to methods? That is because we are defining a method signature. This means that anyone who wants to respond to the event, must match the signature. Below is an example of a method that matches the signature. However, we have not yet subscribed to the event, so nothing will happen yet.
The question mark ? is a bit of “syntactic sugar” that checks whether anyone has subscribed to the event. If we try to raise or invoke an event without subscribers, we get an error.
The Invoke() method is how we raise or “broadcast” the event. In this example, the event expects one parameter; a bool.
1
2
3
4
private void RespondToButtonEvent(bool switchedOn)
{
    // Do something when the event is raised
}
Adding an event to the Button
We will add the same delegate and event as in the above example. But instead of raising the event in Start() we will add it in the Update() method where we also change the buttons colour.
1
2
3
4
5
6
7
8
9
10
11
12
13
14
15
16
17
18
19
20
21
22
23
24
25
26
27
28
public class Button : MonoBehaviour
{
    public delegate void ButtonEvent(bool switchedOn);

    public event ButtonEvent onButtonChange;

    // The rest of the class...

    private void Update()
    {
        if (_isPlayerOnButton && Input.GetButtonDown("Jump"))
        {
            _isEnabled = !_isEnabled;

            if (_isEnabled)
            {
                _spriteRenderer.color = enabledColor;
            }
            else
            {
                _spriteRenderer.color = _initialColor;
            }

            // Raise the event when the button changes
            onButtonChange?.Invoke(_isEnabled);
        }
    }
}
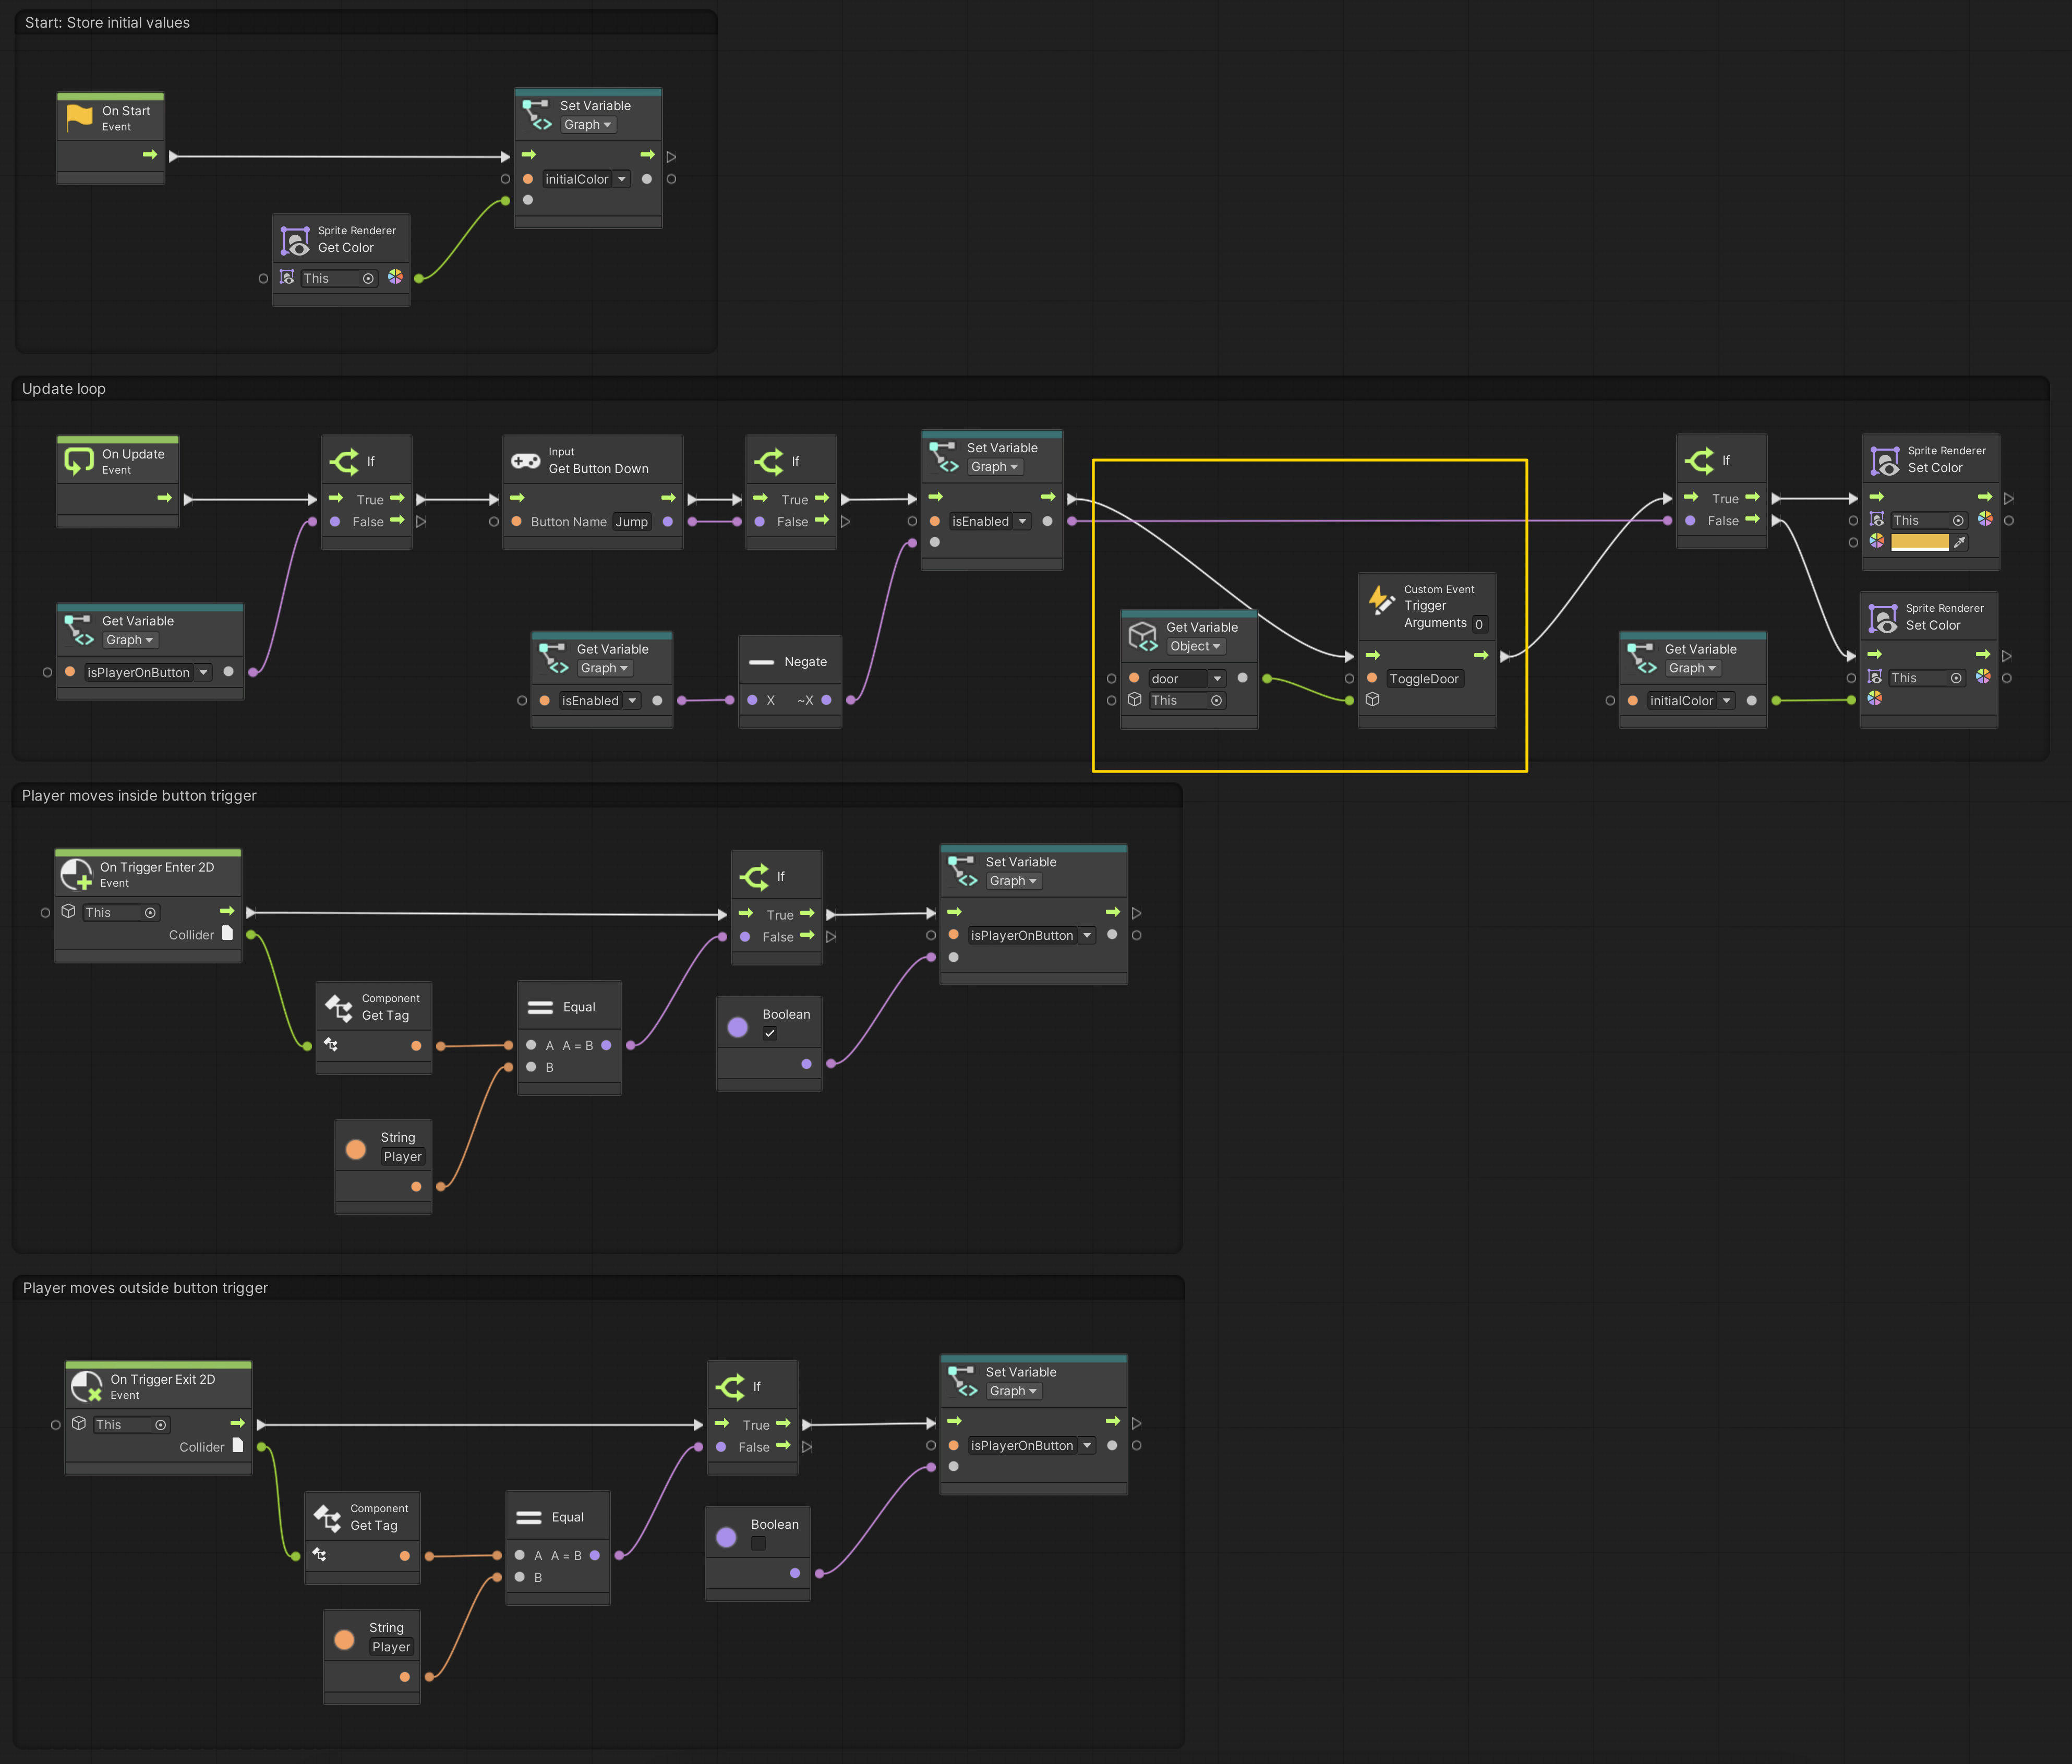
Here is the button graph for comparison.
Creating the door
Now that we have our event we need to make the door that subscribes to the event, and opens or closes accordingly.
Begin by creating a Door script and assign it to the Door game object.
Let’s start by subscribing to the button’s event and write the method that will be called when the event is raised.
We need a reference to the specific Button component. To get that, we will make a public Button variable, and assign it in the Inspector. You assign a reference by dragging the Button game object onto the field on the Door component.
1
2
3
4
5
6
7
8
using System.Collections;
using System.Collections.Generic;
using UnityEngine;

public class Door : MonoBehaviour
{
    public Button button;
}

Next, we subscribe to the event in the Start() method. When we subscribe to an event, we also need to unsubscribe. The appropriate way here, is to do it in OnDestroy(), which is another “magic” Unity method.
We must use the special += operator syntax when subscribing to an event. To unsubscribe, we use the -= operator.
To test if everything works, we output some text into Unity’s Console, by using the Debug.Log() method. Make sure to open the Console window or tab, to see the logs.
1
2
3
4
5
6
7
8
9
10
11
12
13
14
15
16
17
18
19
public class Door : MonoBehaviour
{
    public Button button;

    private void Start()
    {
        button.onButtonChange += HandleButtonChange;
    }

    private void OnDestroy()
    {
        button.onButtonChange -= HandleButtonChange;
    }

    private void HandleButtonChange(bool switchedOn)
    {
        Debug.Log("The button has changed!");
    }
}
All we need now is to create a public variable that allows us to input some offset for when the door opens, and save the door’s start position for closing it again. We can use the Vector3 data type to store this information. We also store whether the door is open or closed in a private bool.
The way we can get or set the objects position, is by accessing the Transform component. Since this is very common, Unity provides easy access (what do you think the code below does?):
1
2
3
4
5
Vector3 position = transform.position;

position += new Vector3(5f, 0f, 0f);

transform.position = position;
What does the
+=do?Certain operations are very common in programming. Therefore, most programming languages provides some shorthand notation to accomplish common operations.
The
+=is one of these. It means “add the value on the right hand side to the current value”. The more verbose syntax would be:x = x + 5;, instead ofx += 5;Similarly, you can say
-=,*=and/=for subtracting, multiplying, or dividing the value.Note that for events, the
+=and-=has a special meaning, which can be confusing at the beginning.
The final door class now looks like this:
1
2
3
4
5
6
7
8
9
10
11
12
13
14
15
16
17
18
19
20
21
22
23
24
25
26
27
28
29
30
31
32
33
34
35
36
37
38
39
using System.Collections;
using System.Collections.Generic;
using UnityEngine;

public class Door : MonoBehaviour
{
    public Button button;
    public Vector3 offset;

    private Vector3 _startPosition;
    private bool _isOpen; // default value is false

    private void Start()
    {
        button.onButtonChange += HandleButtonChange;
        _startPosition = transform.position;
    }

    private void OnDestroy()
    {
        button.onButtonChange -= HandleButtonChange;
    }

    private void HandleButtonChange(bool switchedOn)
    {
        Debug.Log("The button has changed!");

        if (_isOpen)
        {
            transform.position = _startPosition;
            _isOpen = false;
        }
        else
        {
            transform.position = _startPosition + offset;
            _isOpen = true;
        }
    }
}
For the demo scene, an offset of -1.5 for the Y component works well.

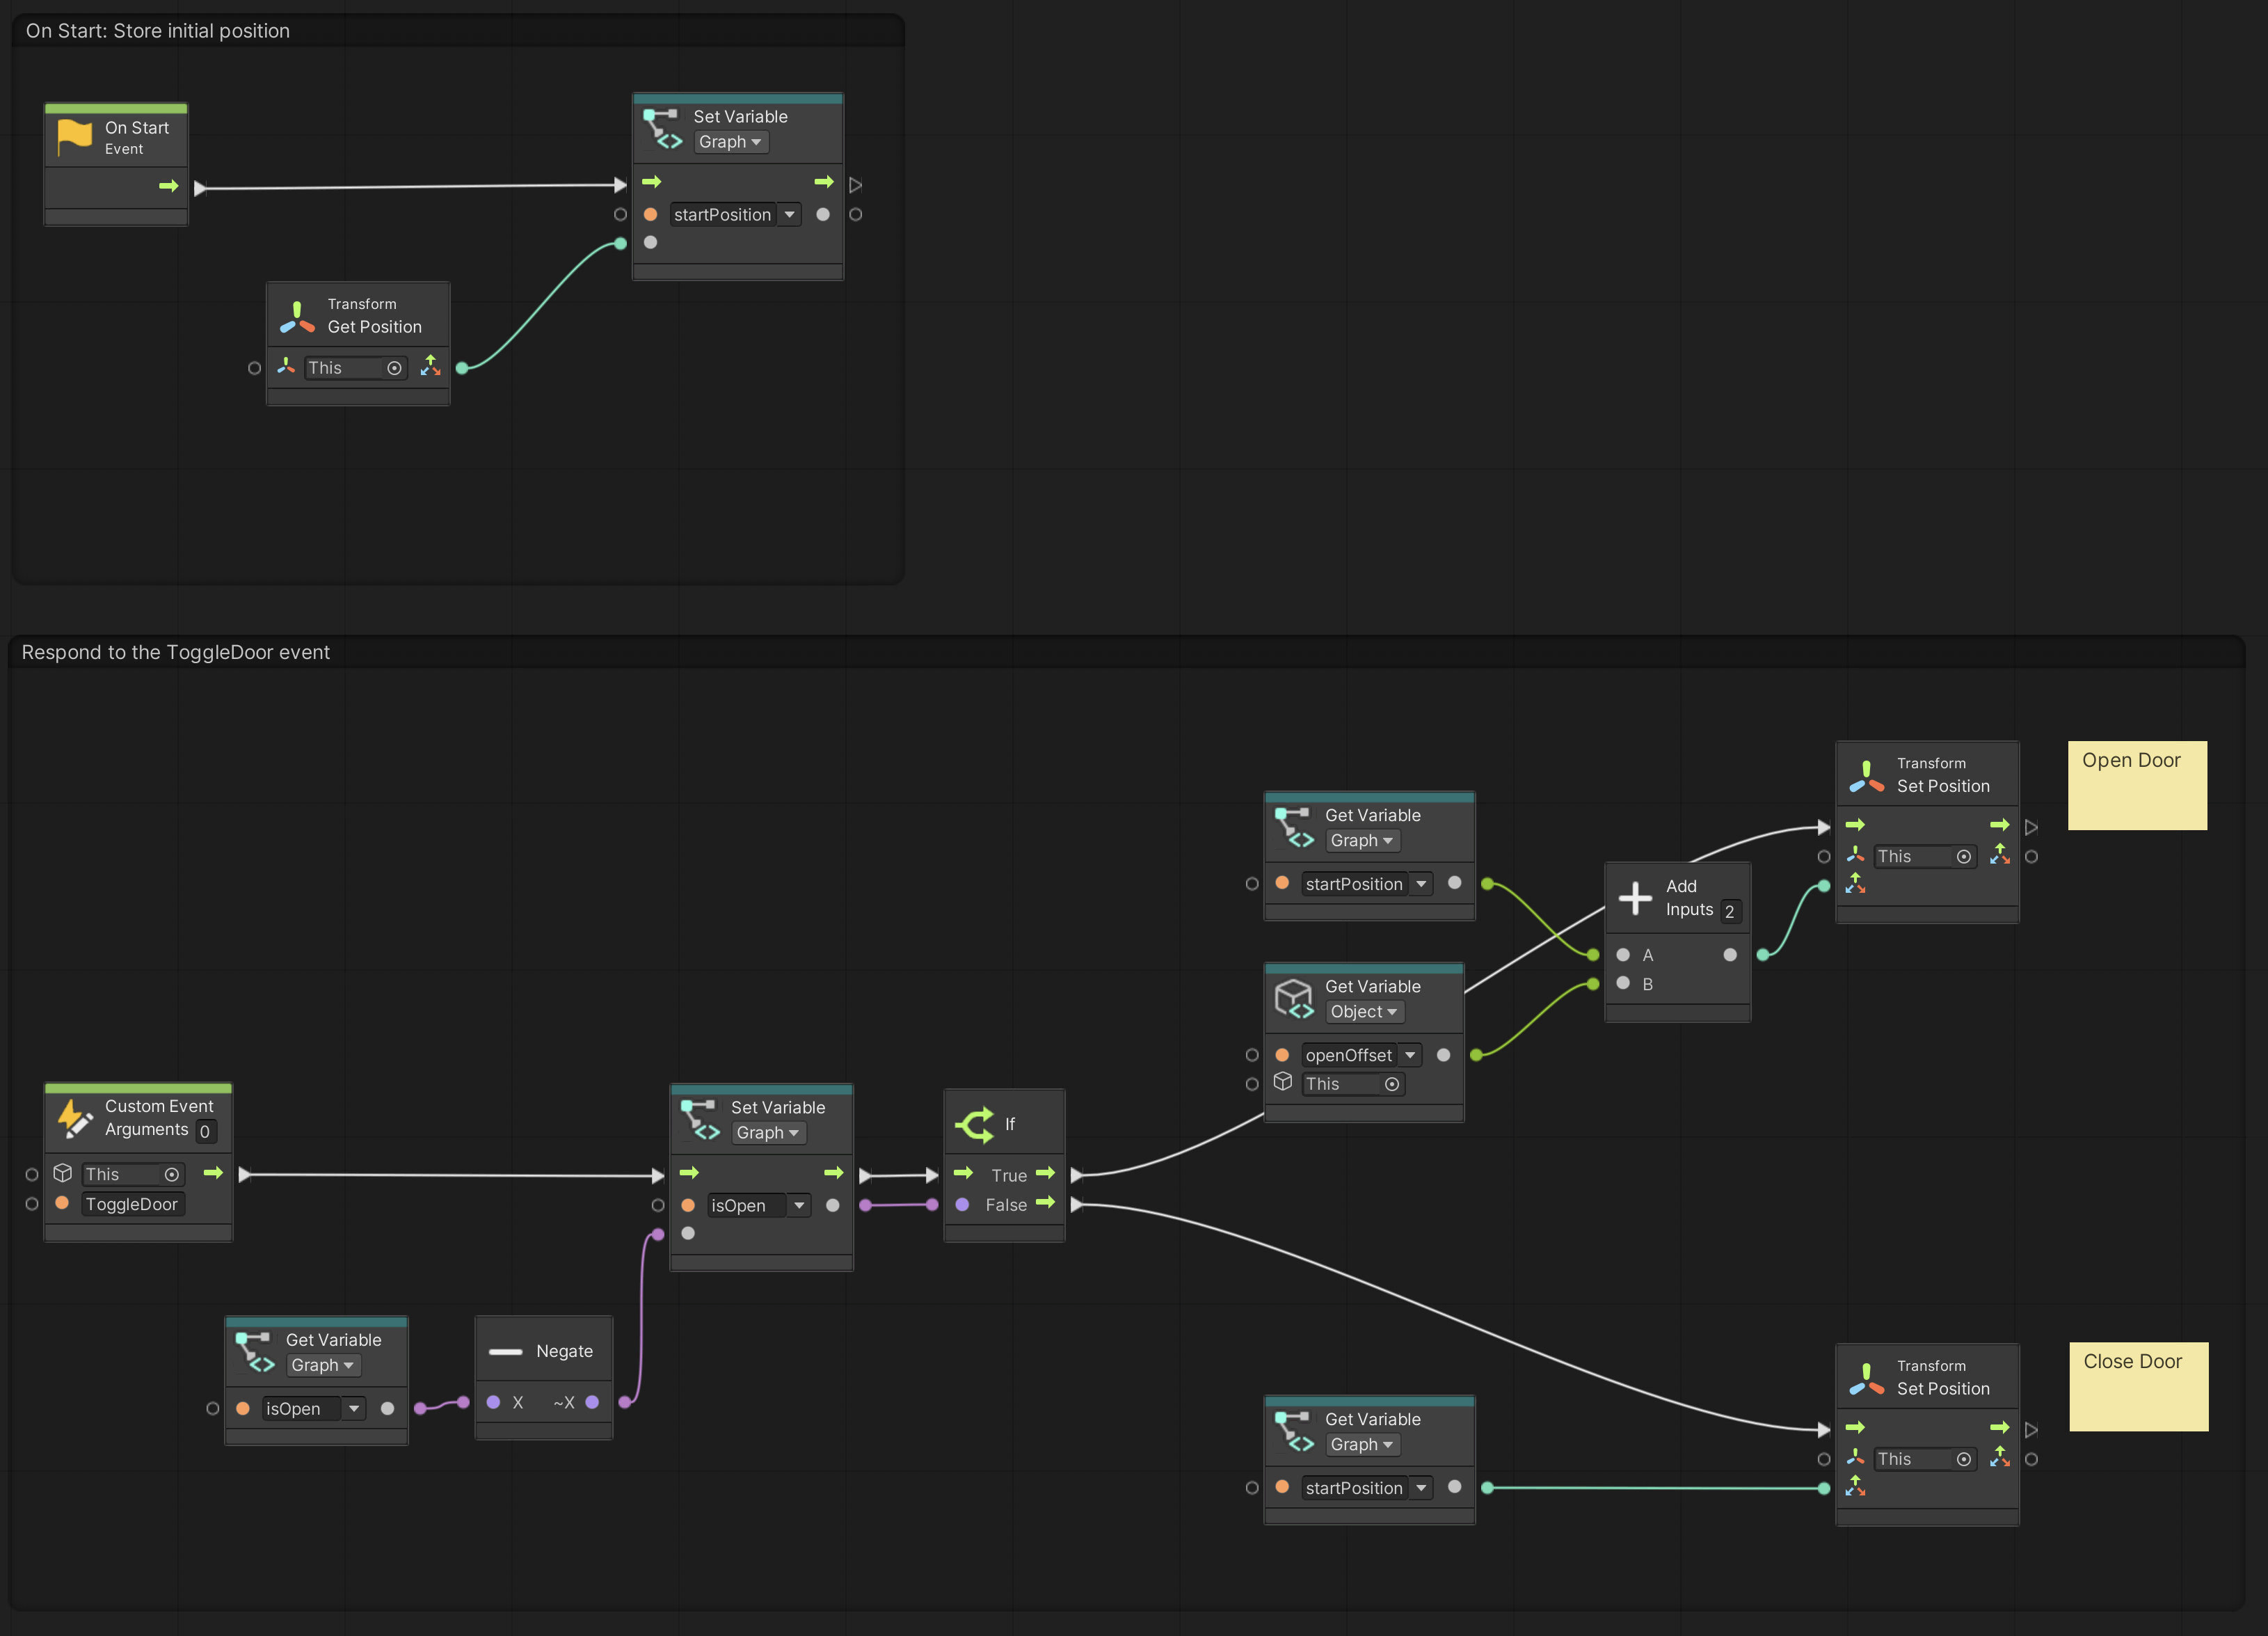
And the door graph for comparison.