02. A Button
Using Unity 2021.3.33f1 and Visual Scripting 1.8.0. The project is using the 2D Core template.

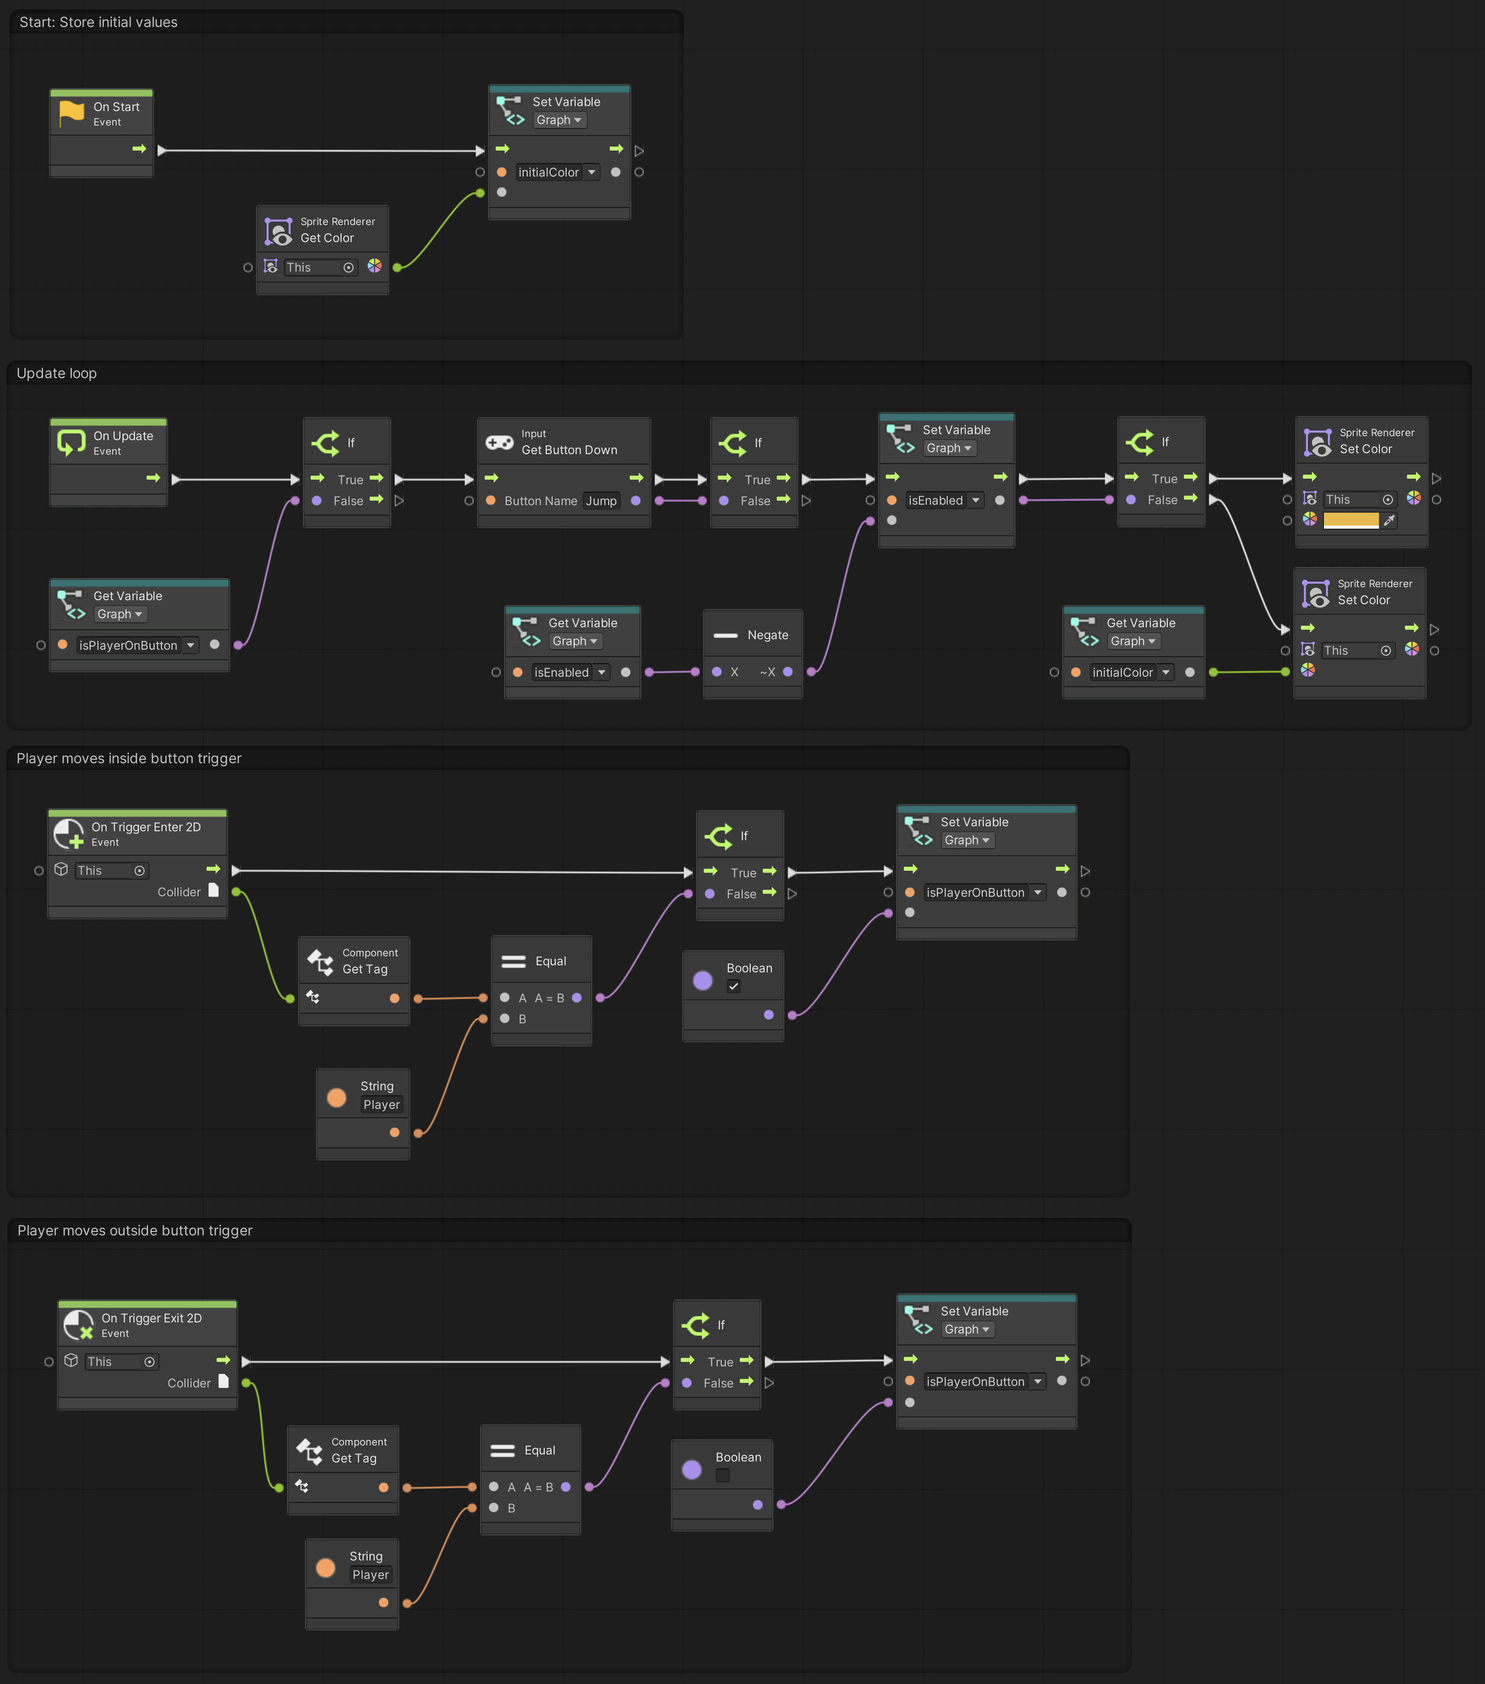
This example demonstrates a simple button that switches between two colours.
See the visual script version: 02. A Button
Storing initial values
Start by creating a new script named Button. Assign it to the Button game object in the scene.
We begin by getting a reference to the SpriteRenderer component. Immediately after, we save the initial color of the SpriteRenderer in the _initialColor variable. Colors typically use the Color data type, similar to Vector2.
1
2
3
4
5
6
7
8
9
10
11
12
13
14
15
using System.Collections;
using System.Collections.Generic;
using UnityEngine;

public class Button : MonoBehaviour
{
    private SpriteRenderer _spriteRenderer;
    private Color _initialColor;

    private void Start()
    {
        _spriteRenderer = GetComponent<SpriteRenderer>();
        _initialColor = _spriteRenderer.color;
    }
}
Registering when the player is within range
We can use the OnTriggerEnter2D() and OnTriggerExit2D() events, to check when the player moves into the trigger on the game object.
Tags are one way to identify objects, which we will use here. We store whether the player is currently inside the trigger or not using a bool.
What is a bool?
A bool is a type of data that is either
trueorfalse.
We will use this information later in the Update() loop. For now, add the following to the class:
1
2
3
4
5
6
7
8
9
10
11
12
13
14
15
16
17
18
19
// The rest of the class

private bool _isPlayerOnButton;

private void OnTriggerEnter2D(Collider2D other)
{
    if (other.CompareTag("Player"))
    {
        _isPlayerOnButton = true;
    }
}

private void OnTriggerExit2D(Collider2D other)
{
    if (other.CompareTag("Player"))
    {
        _isPlayerOnButton = false;
    }
}
The CompareTag() method returns a bool. If the tag of the Collider2D matches the string "Player", it will return true and otherwise false.
The condition of an if (...) statement, must always evaluate to either true or false. This means we can do things like:
1
2
3
4
if (_isPlayerOnButton)
{
    // If true, do something
}
But we cannot say:
1
2
3
4
if (100)
{
    // This will give in error
}
However, we can use the greater > or less than < operators, to compare values:
1
2
3
4
if (100 > 5)
{
    // Always true, since 100 is greater than 5
}
Instead of hard-coded numbers, we could replace one or both numbers with variables.
The update loop
The last bit we need to add, is the update loop where we check whether the player is on the button (inside the trigger), and whether the jump button has been pressed.
Add the following to the beginning of the class:
1
2
3
public Color enabledColor = Color.yellow;

private bool _isEnabled;
And the Update() method:
1
2
3
4
5
6
7
8
9
10
11
12
13
14
15
16
private void Update()
{
    if (_isPlayerOnButton && Input.GetButtonDown("Jump"))
    {
        _isEnabled = !_isEnabled;

        if (_isEnabled)
        {
            _spriteRenderer.color = enabledColor;
        }
        else
        {
            _spriteRenderer.color = _initialColor;
        }
    }
}
Notice that the if (...) statement can be nested inside another.
1
2
3
4
5
6
7
if (condition)
{
    if (otherCondition)
    {
        // Do something if both conditions are true
    }
}
The above can be simplified by using the && (AND) logical operator. This is a special operator that works on booleans (bool) and evaluates to true if both conditions are true.
1
2
3
4
5
6
7
8
9
if (true && true)
{
    // This is true
}

if (true && false)
{
    // This is false
}
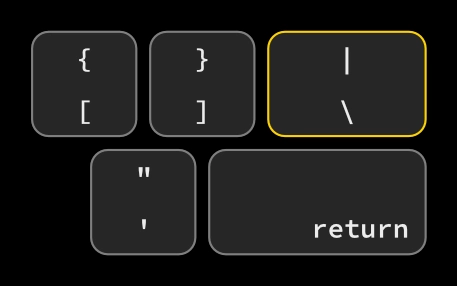
Another related operator is the || (OR) logical operator. It evaluates to true if any of the conditions are true. Note that it is not two ii, but the special vertical line or “pipe” character located above the “return” key on US keyboards.
1
2
3
4
5
6
7
8
9
if (true || false)
{
    // This is true
}

if (false || false)
{
    // This is false
}
What is public and private?
The keywords
publicandprivateare known as access modifiers. They mark the access level of a variable/field or a method. Apublicvariable is accessible by other classes (scripts) and are exposed in Unity. On the other hand,privatevariables cannot be read or changed by other classes. If you leave it out, they will beprivate.
The complete Button class
The Button component should appear like this in Unity, with the enabledColor exposed in the Inspector.
1
2
3
4
5
6
7
8
9
10
11
12
13
14
15
16
17
18
19
20
21
22
23
24
25
26
27
28
29
30
31
32
33
34
35
36
37
38
39
40
41
42
43
44
45
46
47
48
49
50
51
52
53
using System.Collections;
using System.Collections.Generic;
using UnityEngine;

public class Button : MonoBehaviour
{
    public Color enabledColor = Color.yellow;

    private SpriteRenderer _spriteRenderer;
    private Color _initialColor;

    private bool _isPlayerOnButton;
    private bool _isEnabled;

    private void Start()
    {
        _spriteRenderer = GetComponent<SpriteRenderer>();
        _initialColor = _spriteRenderer.color;
    }

    private void OnTriggerEnter2D(Collider2D other)
    {
        if (other.CompareTag("Player"))
        {
            _isPlayerOnButton = true;
        }
    }

    private void OnTriggerExit2D(Collider2D other)
    {
        if (other.CompareTag("Player"))
        {
            _isPlayerOnButton = false;
        }
    }

    private void Update()
    {
        if (_isPlayerOnButton && Input.GetButtonDown("Jump"))
        {
            _isEnabled = !_isEnabled;

            if (_isEnabled)
            {
                _spriteRenderer.color = enabledColor;
            }
            else
            {
                _spriteRenderer.color = _initialColor;
            }
        }
    }
}


