08. Picking Up A Key
Using Unity 2021.3.27f1 and Visual Scripting 1.8.0. The project is using the 2D Core template.

Picking up keys and other items is central to many games. Keys can be used to unlock doors and items in general are used for a ton of stuff like trading, acquiring new abilities, and many other things.
This example shows how to pick up a key, make it follow the player around, and drop the key again at any location. The next example will show how to place a key at a specific location.
The key
First, create a new game object called Key, assign a BoxCollider2D component and set its Is Trigger property to true. Then assign a new Script Graph. The Key is the yellow triangle in the GIF above.
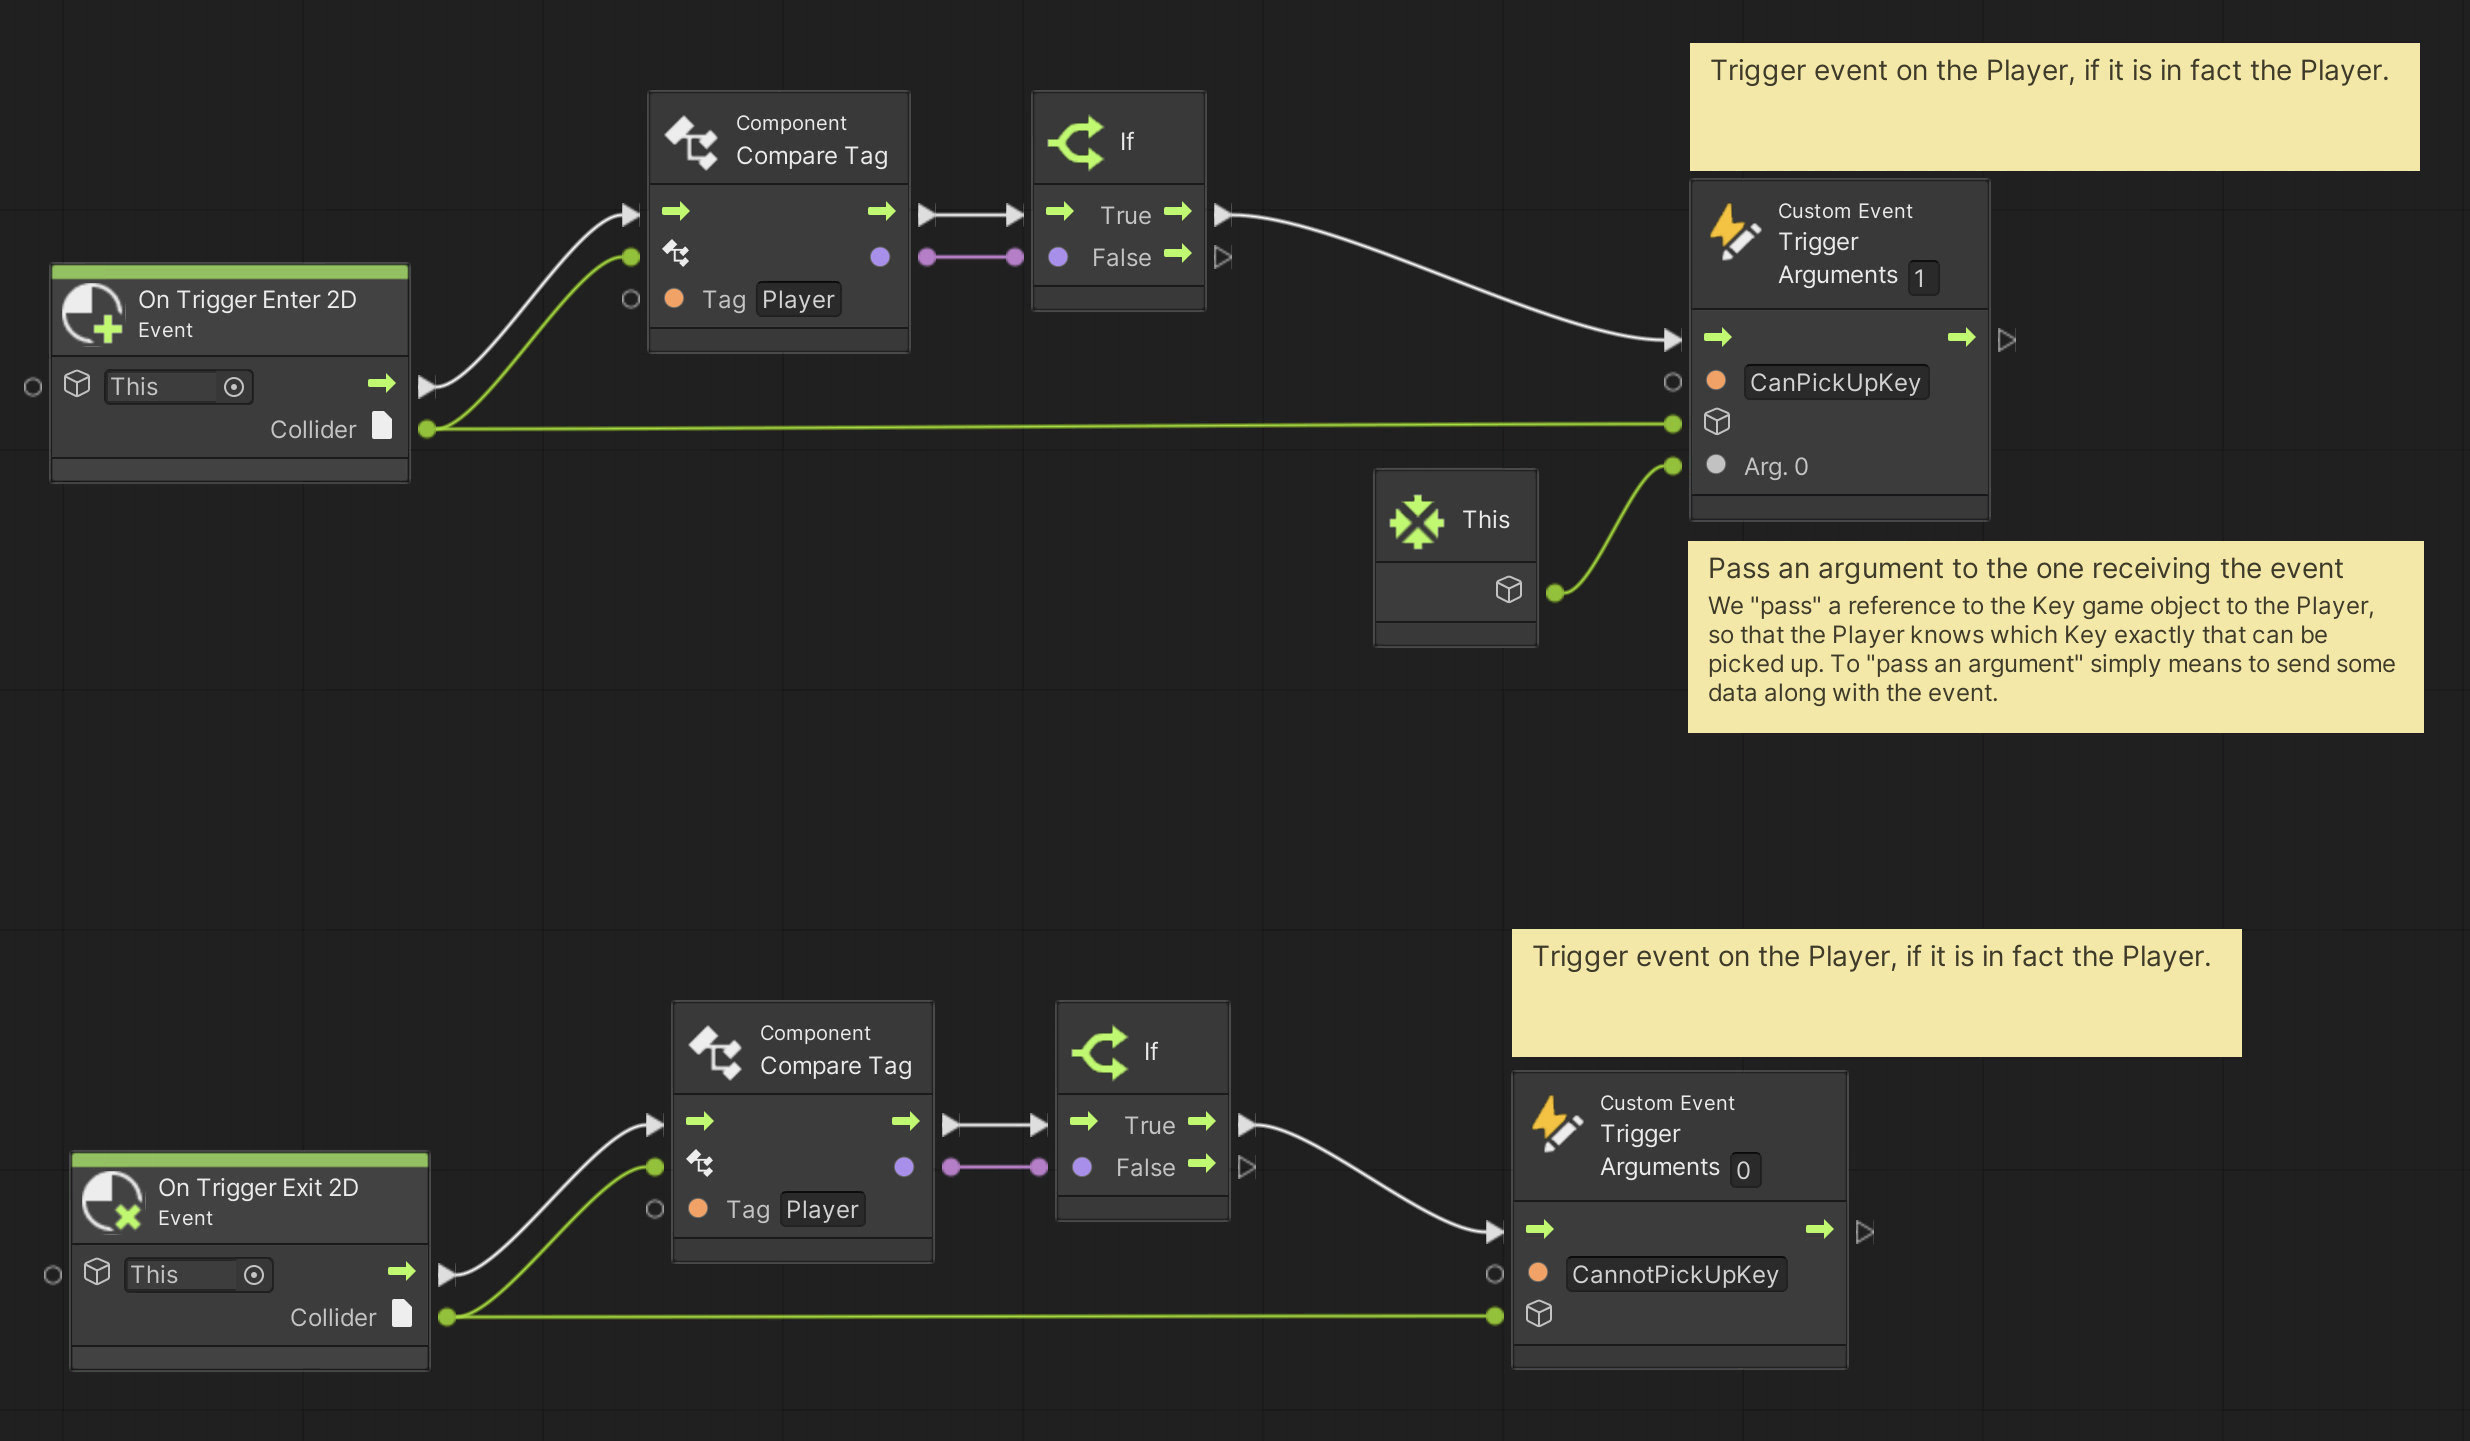
We want the Key to trigger a Custom Event when the Player game object enters and exits the trigger. The event will let the Player know that a Key can be picked up. For the CanPickUpKey event we use an argument Arg. 0 to send a reference to This particular game object - that is, the Key. When the Player then responds to the event, it will know exactly which Key it is that can be picked up.
Arg. 0is just the first piece of data send together with an event. In programming, lists of things are generally zero-indexed. This means that we start counting from zero rather than one. If the event had three arguments they would be calledArg. 0,Arg. 1andArg. 2.
Thisis a special word in programming that refers to “itself”.
Picking up the key
The second piece of the puzzle, is to let the Player handle what to do whenever a Key can be picked up.
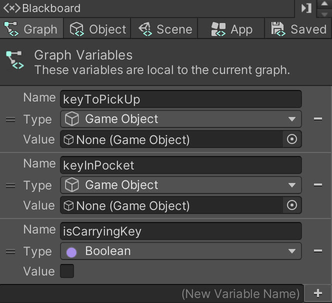
In the Player script graph, start by creating three Graph variables. We will use these variables to remember which Key can be picked up, which Key the Player might currently be carrying, and whether the Player is in fact carrying a Key. The three variables are:
keyToPickUpof typeGame ObjectkeyInPocketof typeGame ObjectisCarryingKeyof typeBoolean
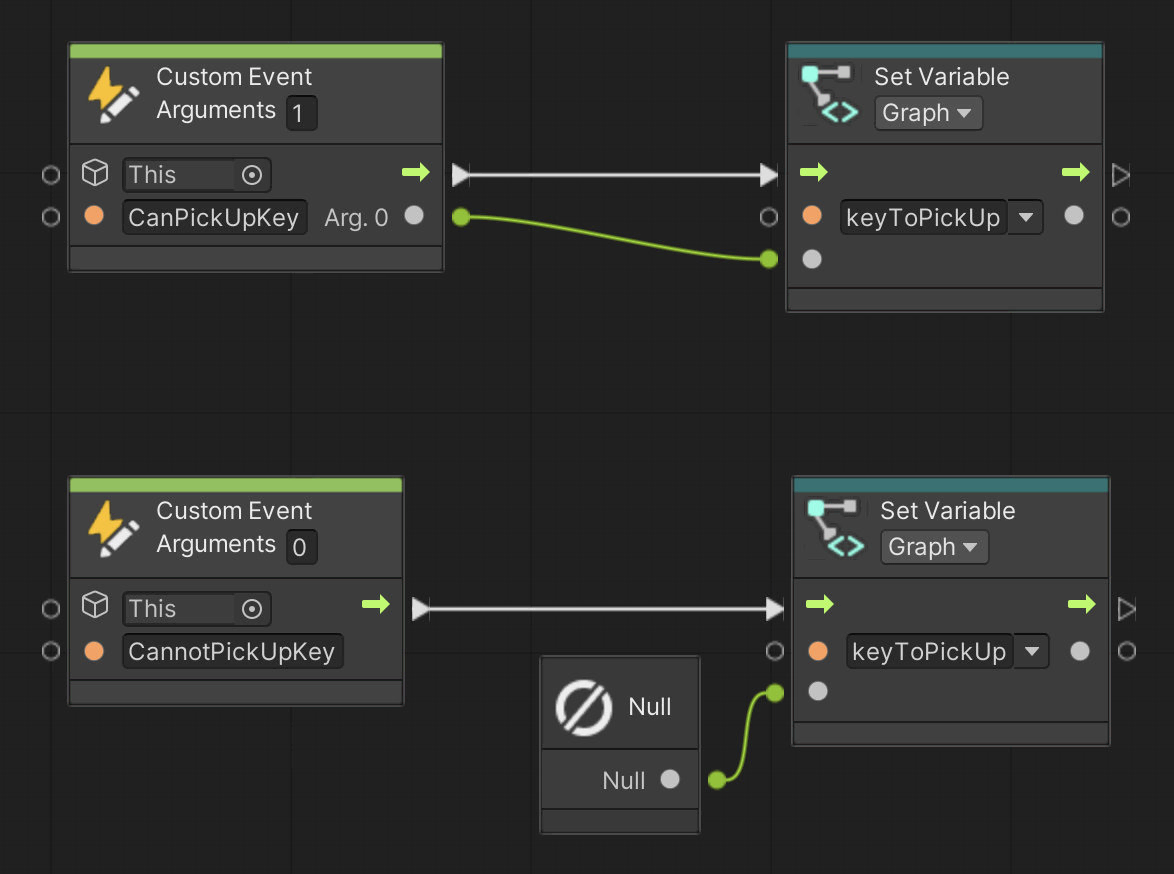
The first step is to respond to the events triggered by the Key. We respond the events using the Custom Event nodes added to the Player graph here. Remember that the CanPickUpKey event is triggered with 1 argument, so we must also receive 1 argument: Arg. 0. We want this argument because it informs us about which Key game object triggered the event. We save this information in the keyToPickUp variable.
The CannotPickUpKey event does not pass any argument. So instead, we set the keyToPickUp to Null.
Nullis a special value that means nothing. Think of it like a street address to nowhere.
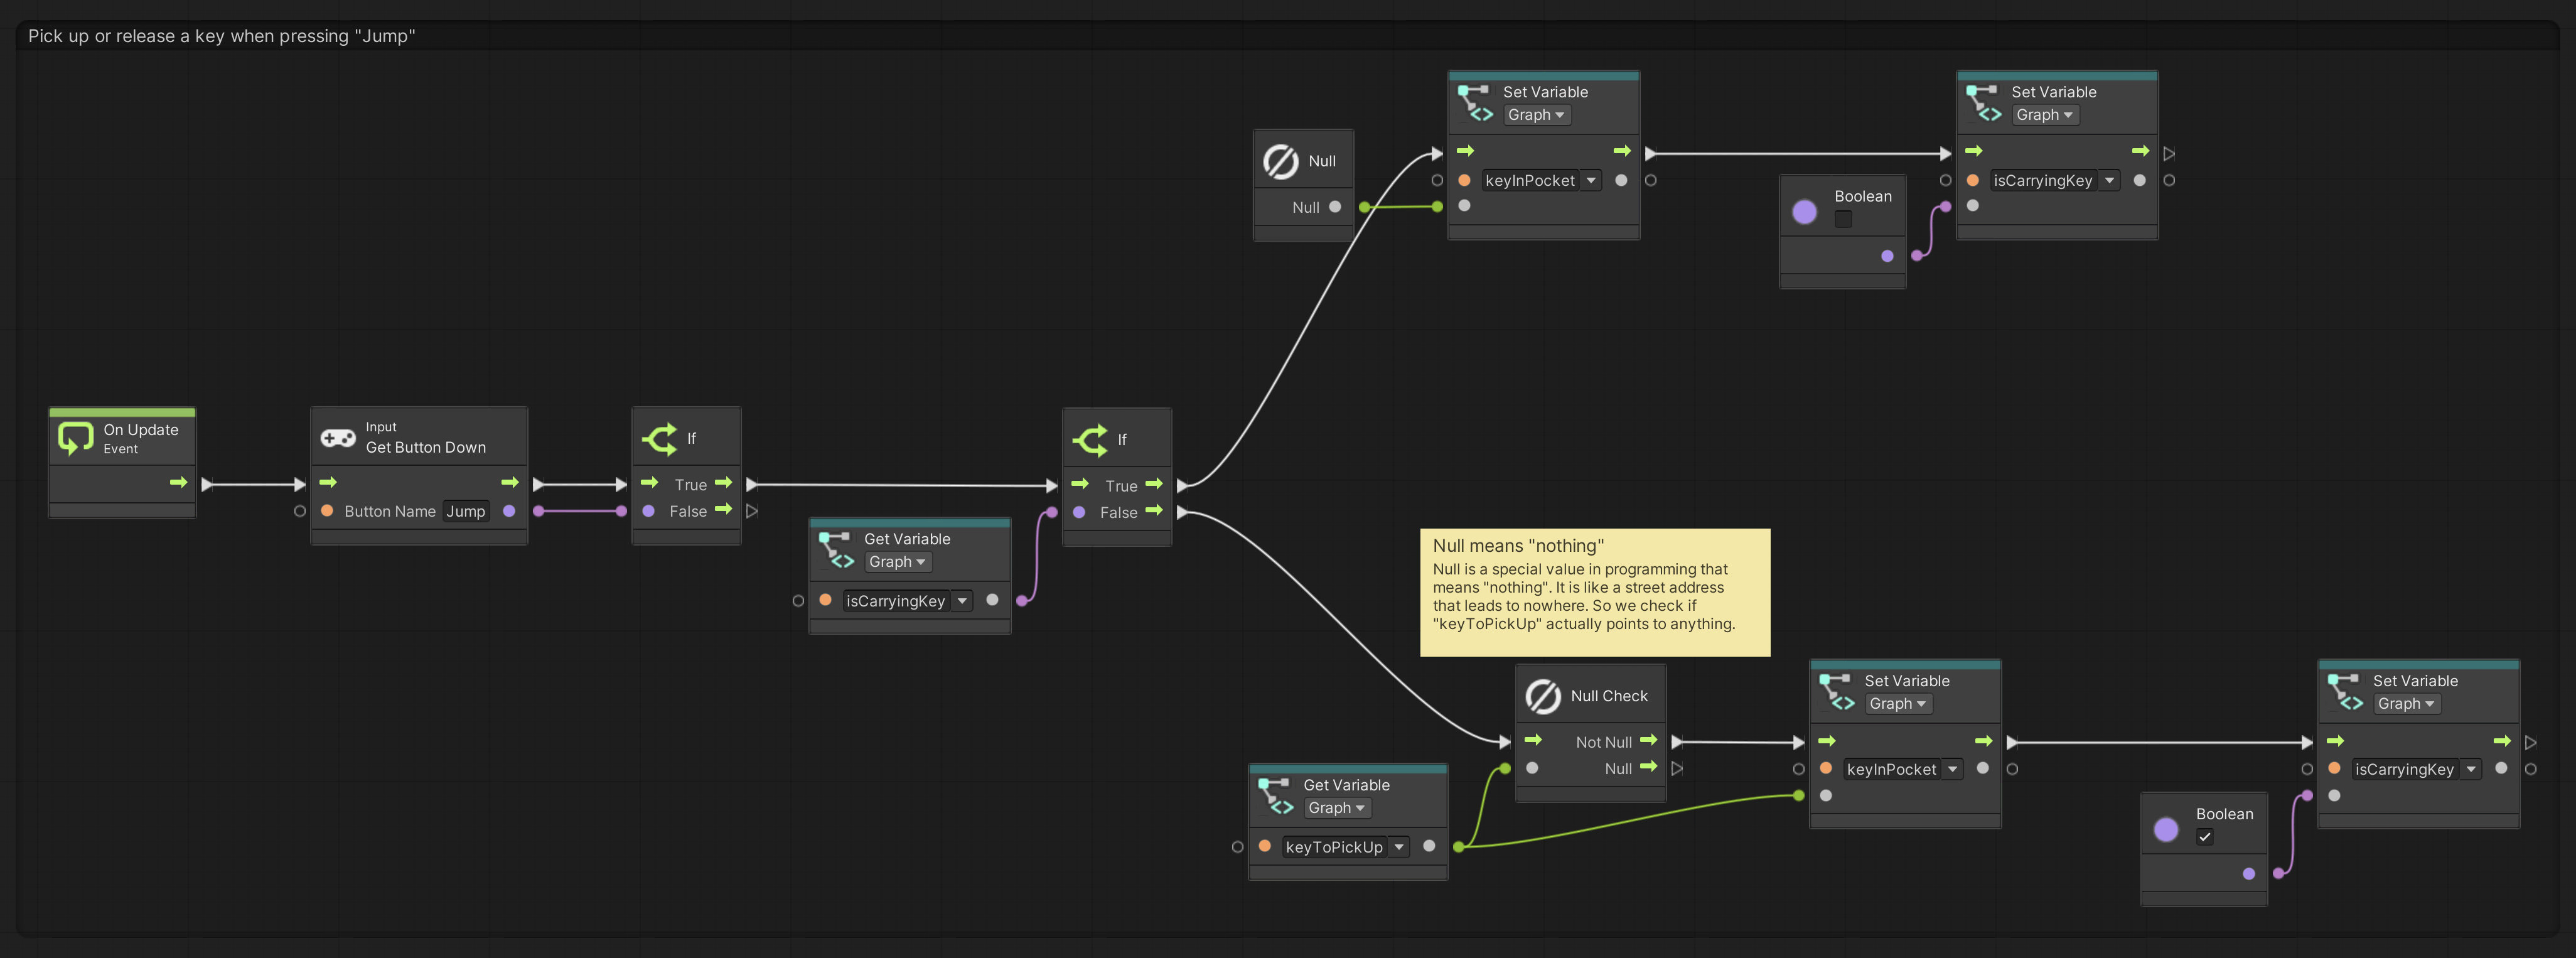
The next piece of the Player flow, is to handle picking up and letting go of Keys. We first check if the Jump button is pressed and if it is, we determine if we are currently carrying a Key. If we are, then we let go of the Key by setting keyInPocket to Null and isCarryingKey to false. If we are not carrying a Key, then we check if we currently have a Key to pick up by checking if keyToPickUp is not Null. If it is not Null, then we can put the Key in our pocket.
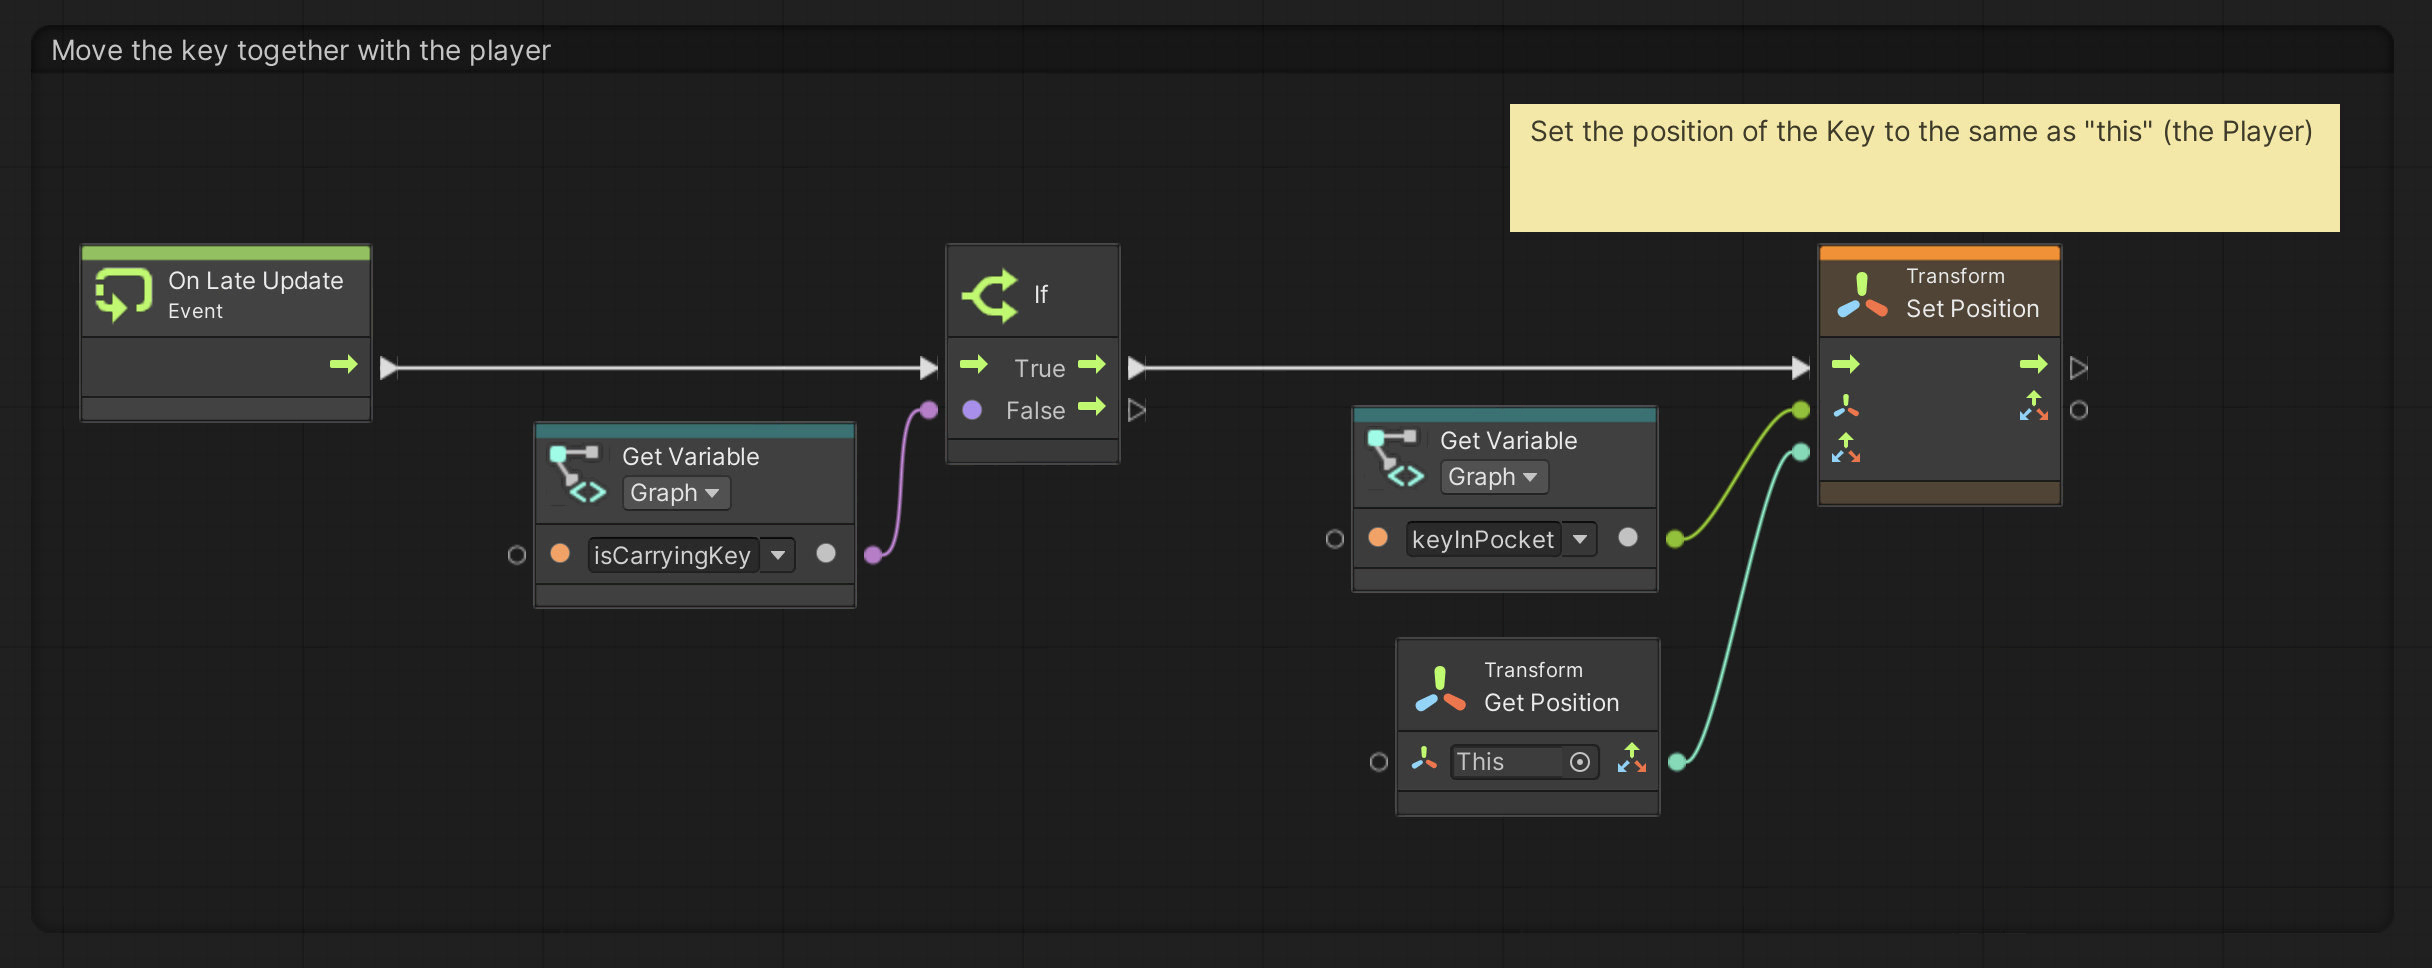
The final piece of the Player flow we want to add, is the logic that moves the Key together with the Player whenever the Player is carrying a Key.
We use On Late Update here because we want to ensure that the scripting logic that moves the Key happens after we have moved the Player. In Unity, all events like On Start, On Update and On Late Update happen at specific times and in a particular order. The ones you will encounter most often happen in the follow order:
On Start(only once)On Enable(once any time a component or game object is enabled)On Fixed Update(at fixed intervals out of sync with frames)On Update(every frame)On Late Update(every frame)On Disable(any time a component or game object is disabled)
You can see the order of all Unity’s event functions here: Order of execution for event functions.