13. Inventory
Using Unity 2021.3.27f1 and Visual Scripting 1.8.0. The project is using the 2D Core template.
Making an inventory requires a number of steps. This example will demonstrate how to make items in the world get into the inventory and how items in the inventory can be used in the world.
I will break down the process into a number of steps.
Preparing the canvas with items
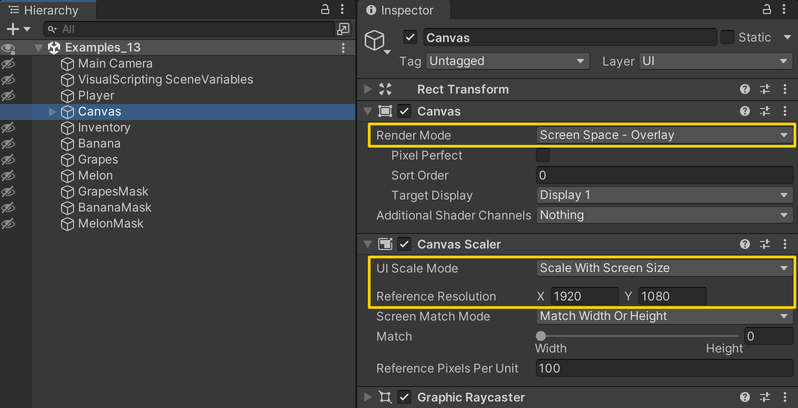
A Canvas is used to create graphics displayed onto the screen rather than in the game world. Often referred to as a graphical user interface (GUI). The Canvas will have a number of children that will be slots for items in the inventory.
To start, add a Canvas to the scene with the following settings.
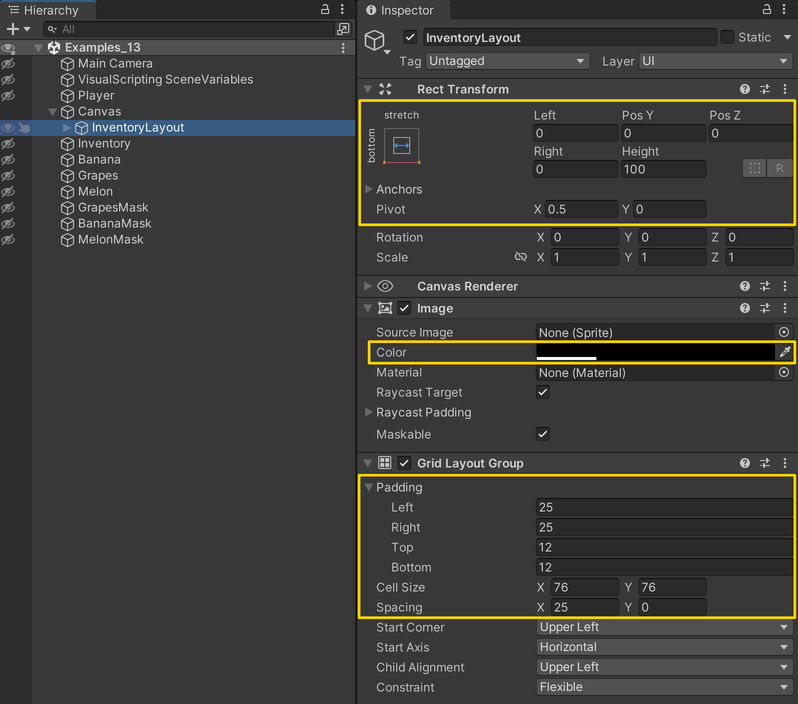
Then, add a game object as a child of the Canvas and add an Image and Grid Layout Group component to it. The Image is given a semi-transparent black colour. The Grid Layout Group will automatically layout its children. For now, set the following settings.
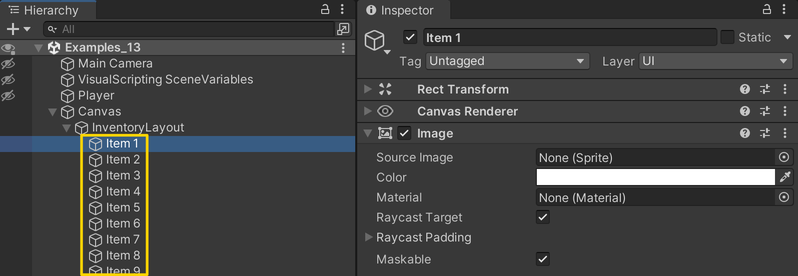
The last step in preparing the Canvas, is to add a number of game objects that we can use as item slots for our inventory. Add as many game objects as you think you will need. Each of the game objects should have an Image component.
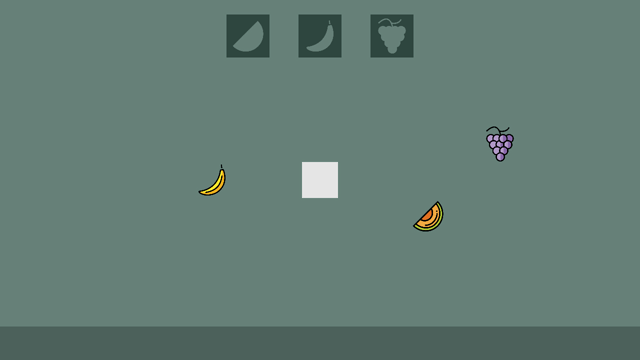
World items
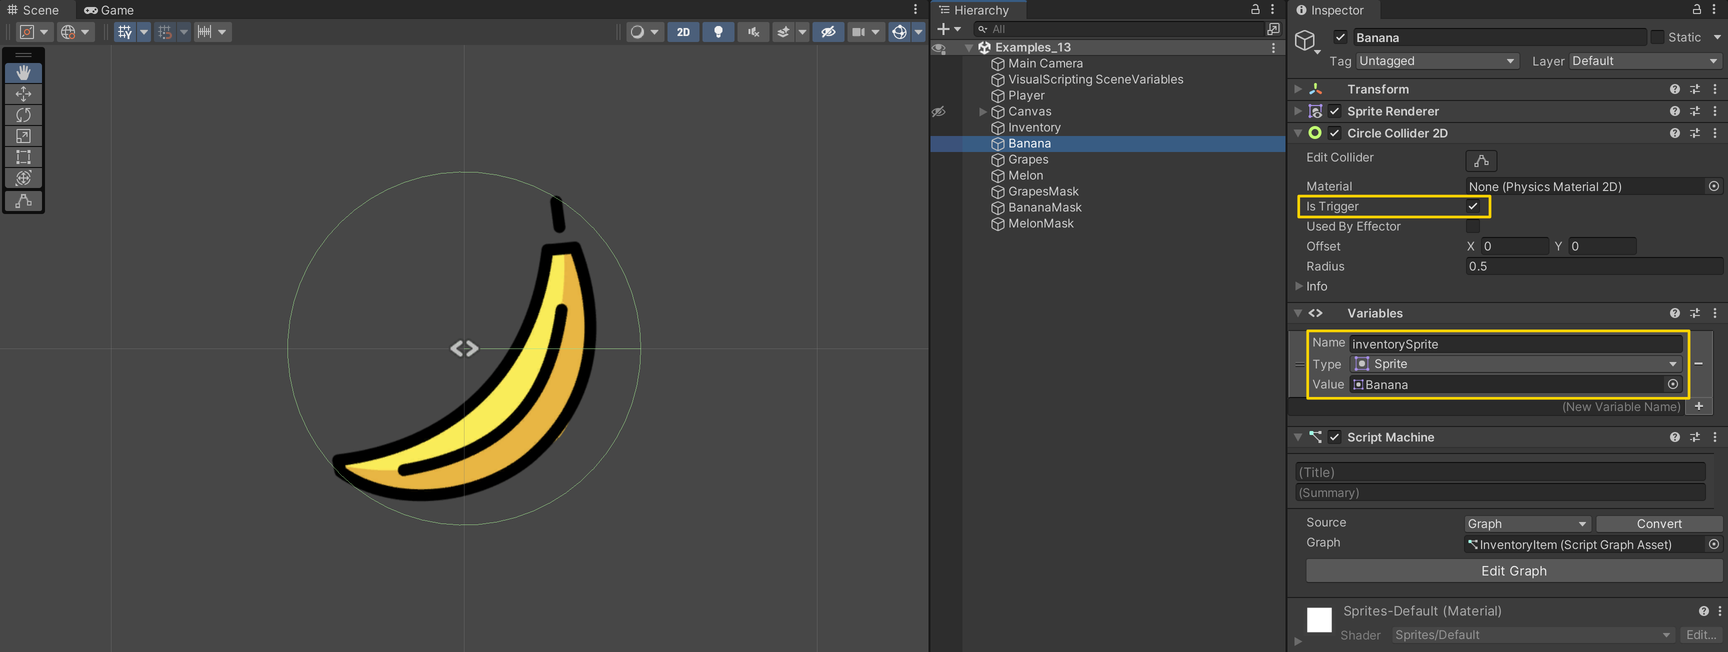
Create a game object with a Sprite Renderer and Circle Collider 2D component. Set the Circle Collider 2D as a trigger. Add a script graph with an Object variable called inventorySprite of type Sprite. Add whatever sprite image you want as the icon for your item. In this example, I am reusing the same sprite for both the inventory and the world. Each item needs to be set up separately, but should use the same script graph.
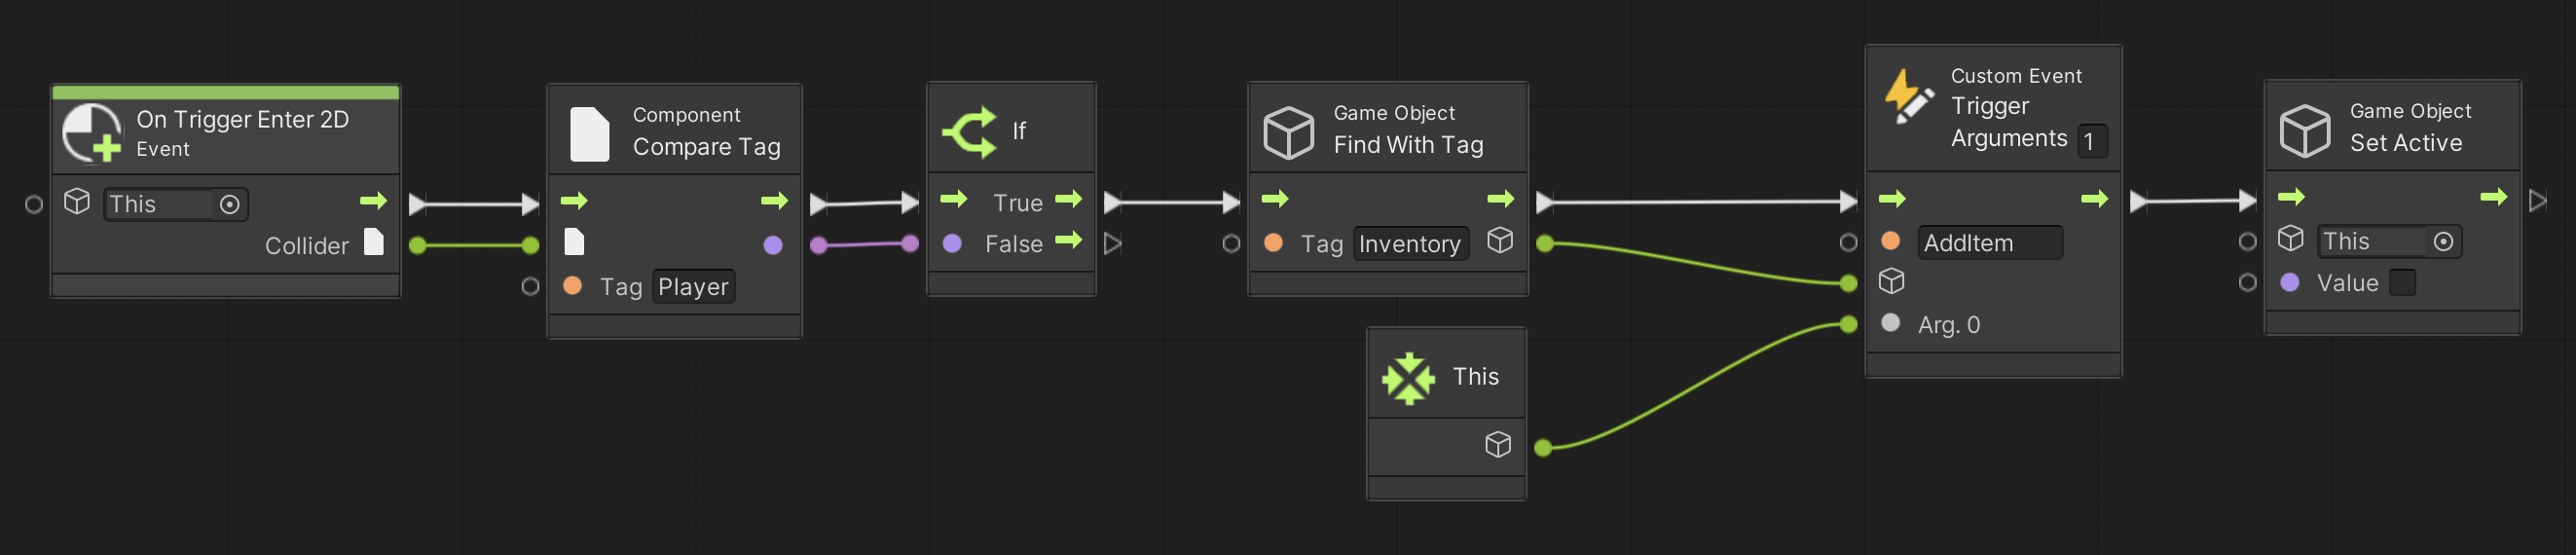
In the script graph, the Game Object: Find With Tag node is used to get a reference to the inventory. We will set this up later.
The Trigger Custom Event will trigger a Custom Event on the Inventory that we will add later. It passes itself (This) as an argument, and finally disabled itself.
Item buckets
Once the items have been collected and placed in the inventory, they can be put into special “buckets”. The buckets are set up with two colliders, the outer one as a trigger.
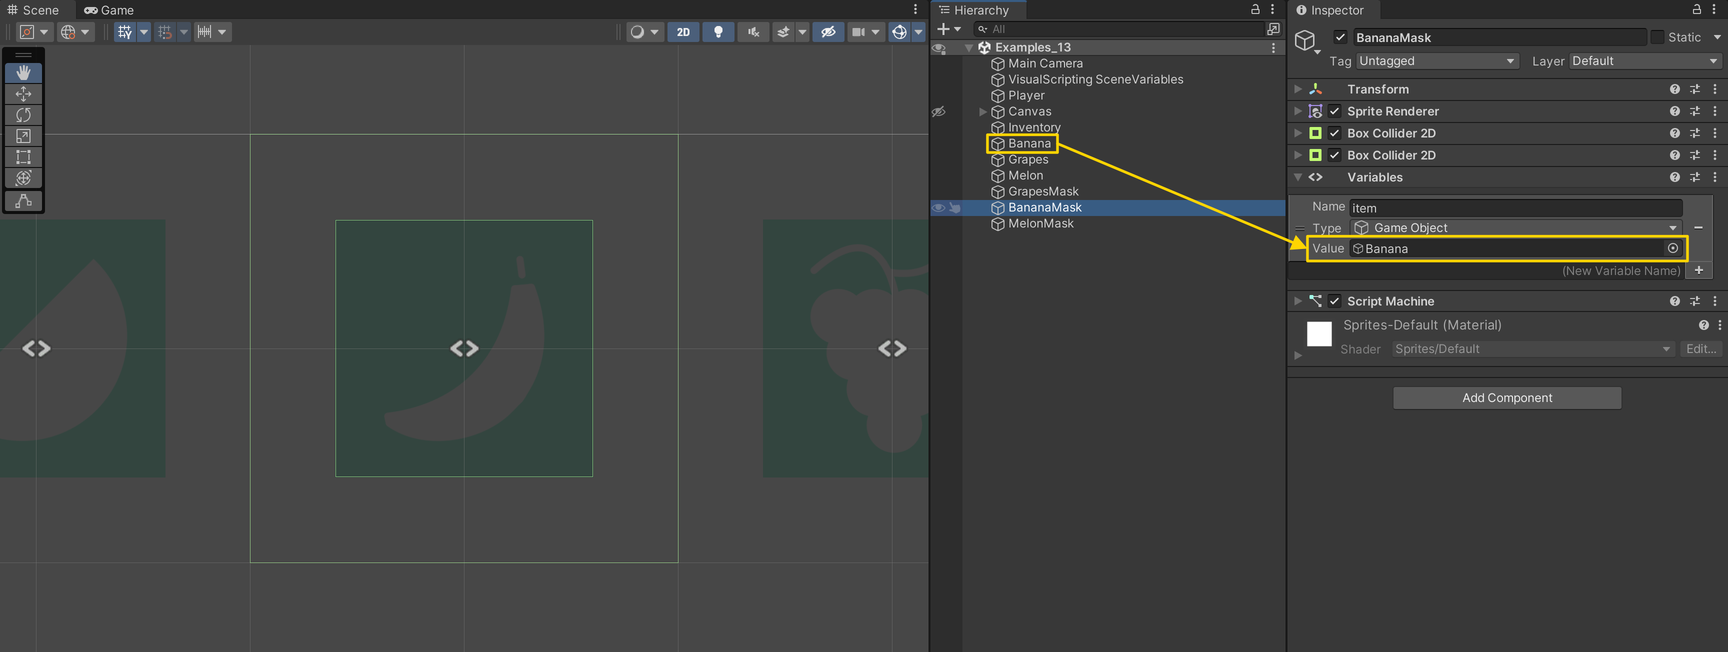
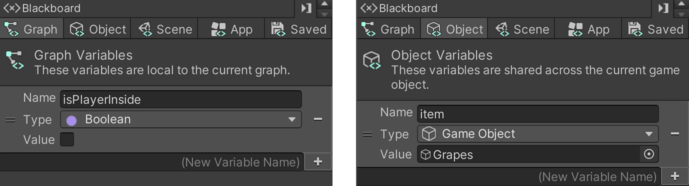
The buckets have one Object variable called item and is of type Game Object that should refer to the game object that can be placed inside them. In addition, it has a Graph variable named isPlayerInside of type Boolean.
The item bucket graph uses the On Trigger Enter 2D and On Trigger Exit 2D events to know whether the Player is near as we have seen in the previous examples.
The On Update event flow first checks if the Player is inside the trigger and whether the Jump button is pressed down.
If it is, then it checks the inventory’s list of items to see if the item it accepts, is currently in the inventory.
If the item is in the inventory, it will be removed from the inventory and its world item counterpart is reactivated and placed at the same position as the bucket. Remember that each item has a world-object and an inventory-object.
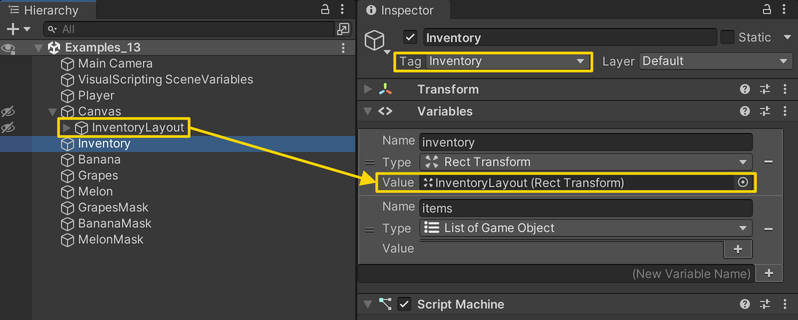
The inventory
The last script graph to make, is the inventory itself. Since we are finding the Inventory game object by its tag, you must change its tag to Inventory.
Before we dive in, let’s get a brief overview of what the inventory needs to do:
- It must get a list of all the Item game objects in the
Canvas. - It should be able to respond to the
AddItemandRemoveItemevents, which in turn should add/remove items of its ownitemslist. - It must show a sprite for any item currently in its
itemslist.
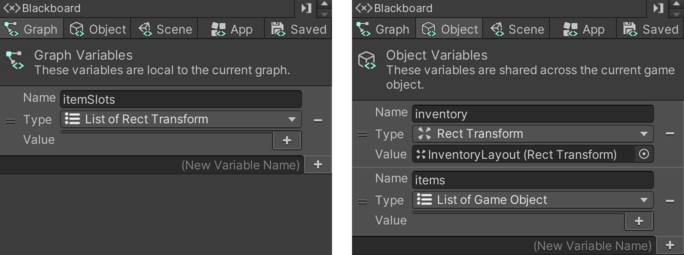
The Inventory has two Object variables: One called inventory of type Rect Transform which should be set to the game object in the Canvas that contains all the item slots. The second variables is called items and is of type List of Game Objects. The value of items will be set in the graph, but we make it an Object variable because other script graphs need access to it.
In addition to the two Object variables, we will also need a Graph variable called itemSlots of type List of Rect Transform. This list will store all the items in the Canvas.
On Start we first get a list of all the Rect Transform children of the inventory inside the Canvas. Then we do a funny thing where we remove the inventory because we are only interested in its children: the items. Get Components In Children oddly enough includes components on the object itself, so its name is a bit misleading. We then save the list to the itemSlots variable and then loop through and disable each item.

The next part of the Inventory graph are the Custom Event nodes that handle adding and removing items. Remember these events are triggered by the items in the world as well as the item buckets. At the end of their flow, they trigger an event called UpdateItems, which we will add next.
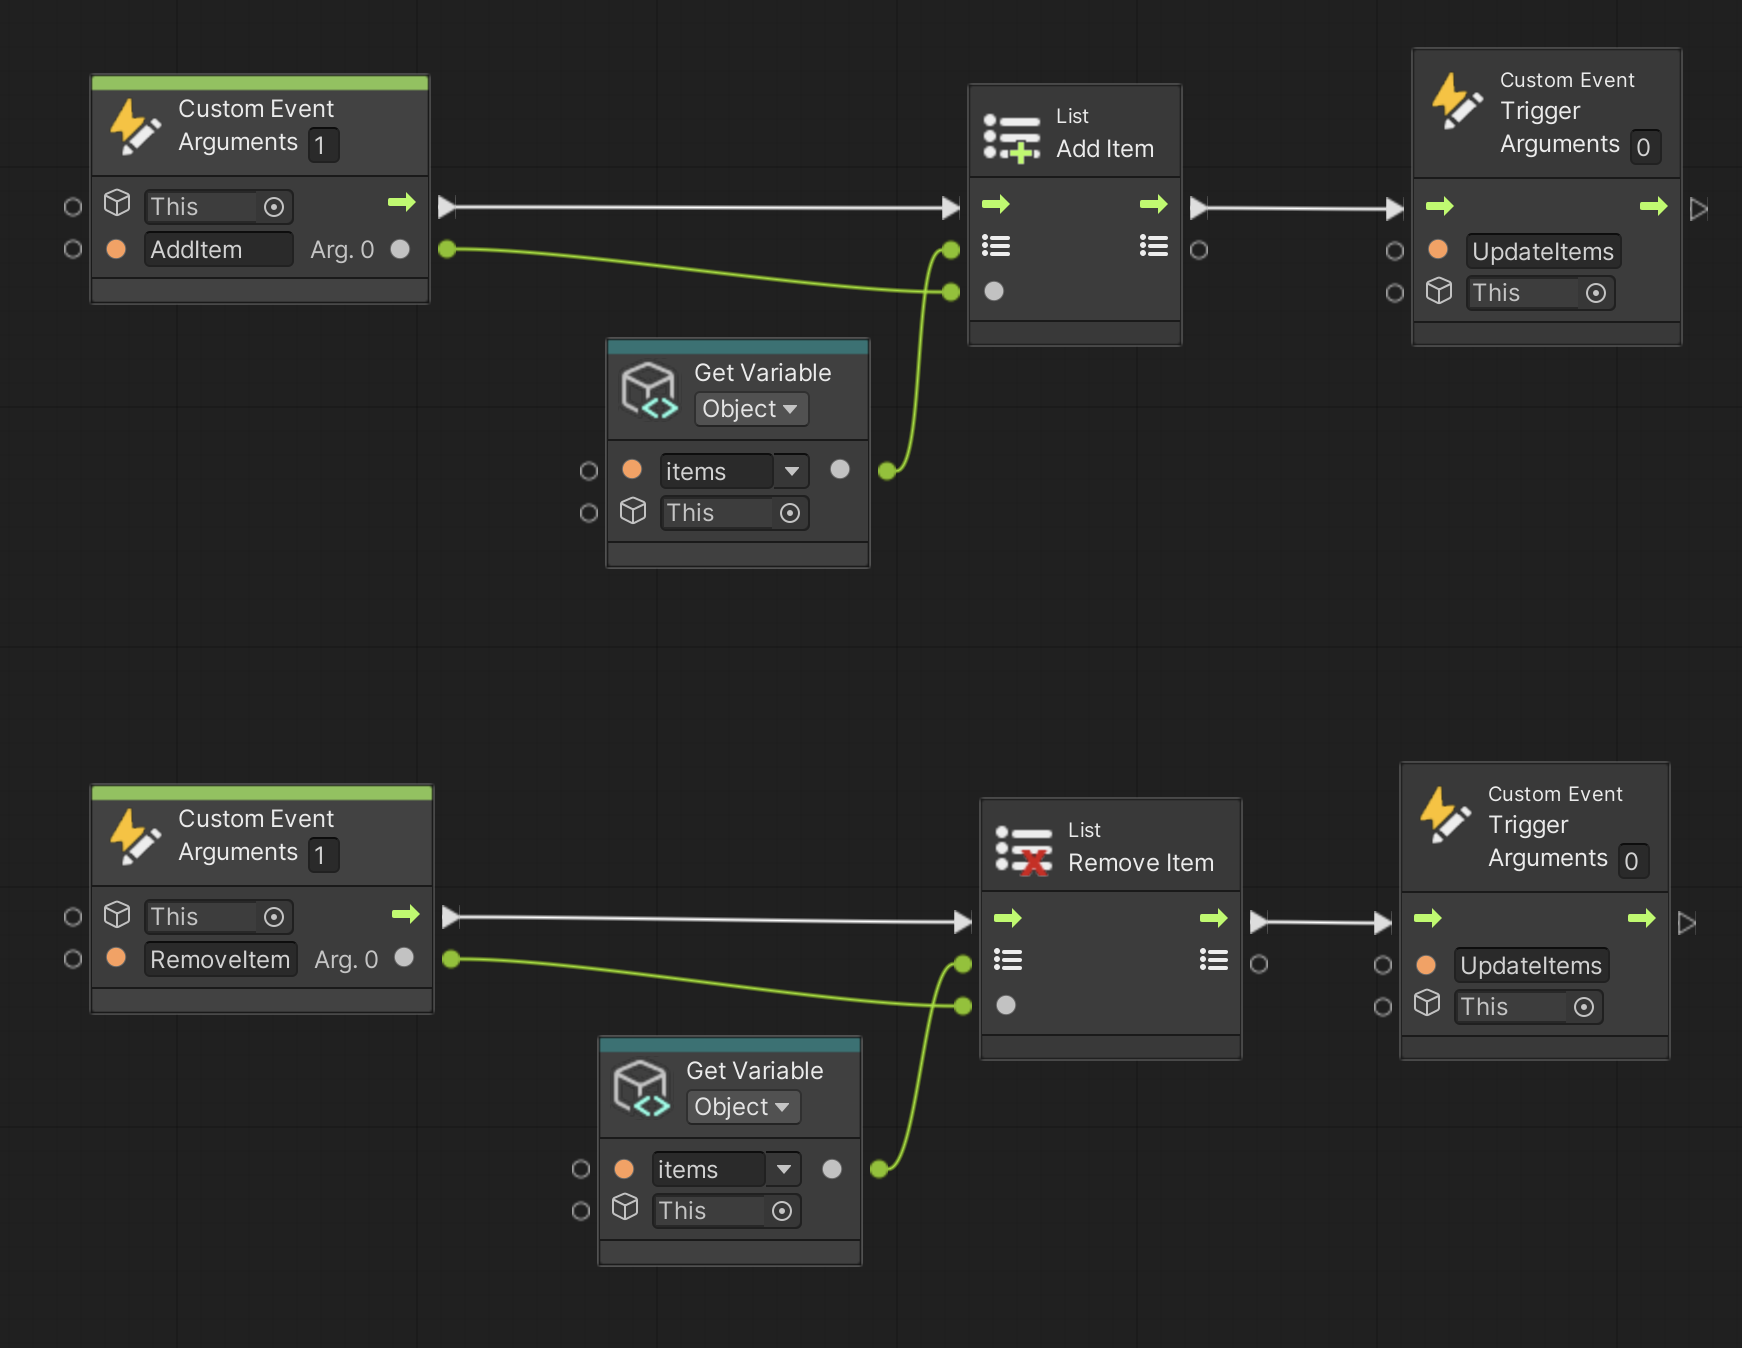
The Custom Event called UpdateItems initially loops through each item in the Canvas and disables it. We do this to start fresh.
Then it uses a For Loop to iterate through two lists at the same time: itemSlots and items. How many itemSlots items it loops through depends on the number of items in the items list (sorry about the use of the word item).
The sprite referenced in inventorySprite on the world item is then assigned to the Image of the item in the inventory and the inventory item is finally enabled.

The fruit emojis are designed by OpenMoji – the open-source emoji and icon project. License: CC BY-SA 4.0